We remain fully operational. Our teams are working around the clock to ensure your deliveries continue safely.

DOWNLOAD THE APP


Customer Services
Copyright © 2025 Desertcart Holdings Limited
DOWNLOAD THE APP

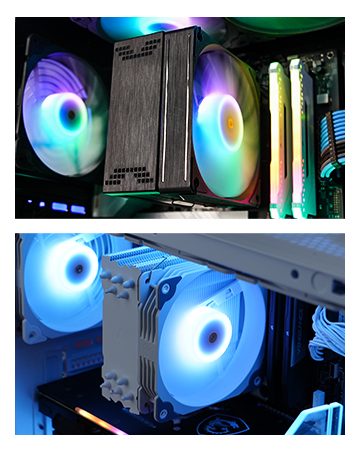
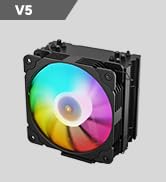
❄️ Stay cool, stay ahead — RGB style meets silent power!
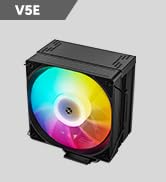
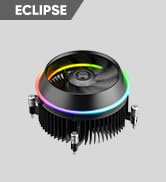
The Vetroo V5 White CPU Air Cooler combines 5 direct-contact heat pipes and a large copper base with high-density aluminum fins to deliver efficient cooling for CPUs up to 150W TDP. Featuring PWM-controlled fan speeds between 800-1700 RPM and ultra-quiet operation at 32.8 dBA, it supports a wide range of Intel and AMD sockets. Its addressable RGB lighting syncs with motherboards for a customizable, modern aesthetic, making it a perfect blend of performance and style for professional builds.


| ASIN | B08F2FS7SR |
| Are Batteries Included | No |
| Best Sellers Rank | 56,511 in Computers & Accessories ( See Top 100 in Computers & Accessories ) 855 in Fans & Cooling |
| Brand | Vetroo |
| Colour | White |
| Customer Reviews | 4.6 4.6 out of 5 stars (1,708) |
| Date First Available | 31 July 2020 |
| Guaranteed software updates until | unknown |
| Item Weight | 761 g |
| Item model number | V5-WT |
| Manufacturer | Vetroo |
| Product Dimensions | 14.8 x 12.8 x 7.5 cm; 761 g |
| Voltage | 12 |
| Wattage | 150 watts |
J**E
perfect once you get the metal straps on the fan
can be confusing but in the end its worth it its silent and keeps my pc cool as hell well worth the price
A**S
nice fan
very nice cpu fan does what it has to do
J**A
this is one of the best cooler I've ever used. it keeps the cpu nice and cold and looks extremely good the rgb fan that comes with it it really good as well it was easy but it look time to install. I recommend this to anyone with a small budget.
D**O
And that's not hyperbole. I honestly thought all the tech YouTube content creators bragging about this CPU cooler were just being over-the-top (until JayzTwoCents reviewed it, anyway) so when I got a new PC with an i7 9700F I knew I needed to get an aftermarket cooler, fast. The noise level of the stock Intel cooler, under any load at all, honestly sounds like my neighbor's cat in heat. It's horrible. This thing is damn near silent. The fan is incredibly easy to install, using a hook system that's quite literally just a piece of wire that latches onto the tower. As a bonus, they actually give you two sets of hooks (4 in total) so you can use your own fans in a Push Pull configuration and maximize the heat dissipation. I have some EZ-DIY fans that I'm going to mount to the tower since I already have another one acting as an auxiliary exhaust fan, and because my motherboard doesn't have an RGB header. Because of that, I can't really speak to the RGB qualities of the included fan. I can say that it, like the cooler tower, feels pretty solidly built. I'm legally blind, but I had no trouble installing it with my motherboard in the case. That being said my case has a cutout section allowing me to easily get access to it. You MAY have to remove your motherboard to attach the backplate, which is true for basically any cooler, unfortunately. You need a backplate, and although some coolers use the Ryzen stock backplate, many don't. The mounting system is great. Because of the size of the tower, it's fairly easy to get it mounted onto the motherboard provided you read the instructions (or look it up on YouTube - there are tons of videos on this thing). Just DO NOT FORGET to remove the little tab on the bottom before you install it! The brackets are labeled based on Intel or AMD, and the Intel specific backplate has settings for the different socket sizes (ex 1150/1151/1200 would be the middle one) and has very tacky tape to hold it in place while you mount the tower. I've also been told you can use screws to mount it, but because of my vision, when it comes to fiddly things like tiny scew holes, I prefer to just use the path of least resistance (i.e. the tape) and call it done. I'm using my own thermal paste (happened to have a tube of Arctic Silver lying around), so I can't speak to the quality of the included paste, but the reviews I've read put it at least on par with the thermal compound used by OEMs so that's a positive for it. Honestly if you're looking to cool a CPU that isn't an 11850K or Ryzen 9, and thus doesn't really need a Noctua cooler the size of a cinder block, I can recommend this one, especially over the massive pain in the butt that some coolers can be. It could *probably* handle a 5900X, especially with two fans in push pull, but honestly, if you're spending that much money on a CPU, you might as well get a proper liquid cooler with a 240 rad at least, at that point. :)
N**Y
I’m really impressed with this CPU cooler fan! The installation was straightforward, and it fit perfectly in my setup. The cooling performance is excellent. My CPU temps have stayed consistently low even under heavy loads, which is exactly what I was hoping for. But what really stands out is the RGB lighting. The colors are vibrant, and the white design looks sleek and modern in my case. The lighting effects are easy to customize, and it really adds a cool aesthetic to my build. Overall, this cooler fan is a great combination of style and function. It works wonderfully to keep my CPU cool and adds a beautiful RGB touch to my setup. Highly recommend it, 5 stars all the way!
B**A
This is a fine product, works well, fit perfectly with zero hassle installing it. The only issue is that the LEDs are not aligned with the others in the computer because this part is sideways compared to the case fans. It's not a huge deal or anything, and for some patterns it wouldn't even be noticeable, but it might bother some people (it sort of bothers me, but not that much).
S**.
For anyone considering buying this for a Dell G5, but who's scared that it may be hard to install: do it. It's easy to install and it's worth it. No customization of additional hardware is required at all. NOTE: I have the G5 model with the solid side panel, I don't know if the dimensions of the one with the transparent side panels are the same. I have almost zero experience in building PCs, but I was able to easily replace a Dell G5 desktop Intel CPU cooler with this one. The general steps are pretty straightforward: 1. Unscrew the old cooler and remove it 2. Clean any leftover thermal paste with a paper towel 3. Adjust the new cooler screw holes so that they fit the 4 holes on the motherboard 4. Apply a pea-sized amount of new thermal paste in the center of the CPU 5. Screw the new cooler to the motherboard 6. Attach the fan and plug the wires (no RGB controller available on the G5 though) I use my CPU to mine, and this cooler drops the temperature by 15° C. With the stock cooler, the CPU was throttling like crazy, now not so much. The provided instructions could include more details for a newbie like me though, like the direction of the fan. I believe the airflow direction follows the "VV" logo on the side of the fan. Three first step also tells you to remove the fan from the cooler, but mine came already separated. To attach the fan to the cooler, I suggest looking for videos on YouTube, as that part could be hard to figure out from the instructions alone. As I mentioned, the G5 motherboard doesn't seem to have any RGB led controller, so the cable is left hanging for now. But I ordered a super unnecessary sata RGB controller that should do the job, I will test it once I receive it in a month or so. When running at full speed, it's also super noisy compared to the stock fan. But I don't really care, since I leave my PC doing its stuff in the garage. It's crazy how it fits the G5 case. I think if it were like 1cm taller, it would protrude the case and we would not be able to install the side panel.
Trustpilot
1 month ago
1 month ago