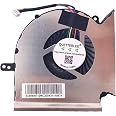
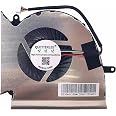
QUETTERLEE Replacement CPU Cooling Fan Compatible MSI GE63VR GE63VR-7RE GE63VR-7RF GE73VR GE73VR-7RE GE73VR-7RF MS-16P1 MS-17C1 PAAD06015SL N383 Fan
| Brand | QUETTERLEE |
| Power Connector Type | 3-Pin |
| Voltage | 5 Volts |
| Wattage | 3 Watts |
| Cooling Method | Air |
| Compatible Devices | Desktop |
| Noise Level | 50 dB |
| Maximum Rotational Speed | 2000 RPM |
| Model number | 8541608037 |
| Item Weight | 68 g |
| Package Dimensions | 12.19 x 12.19 x 11.18 cm; 68 g |
| Item model number | 8541608037 |
| Are batteries included? | No |
Y**S
Works great in my MSI GE75 Raider laptop too!
I have a MSI GE75 Raider laptop. What you get is the fan in a cardboard box along with a prying tool and screwdriver. My laptop has a factory seal sticker covering one of the screw holes on the bottom panel. You must break it in order to remove a screw. If you're in the USA, this does not void your warranty as long as you don't damage or abuse the laptop. There are YouTube videos of people showing you how to open the bottom panel. Remove the battery before you do anything!!! If you're going to replace the CPU and/or GPU fan(s), you must remove the heatsink and also perform a repaste. You'll also need your favorite thermal paste for CPU & GPU and "Computer-Systems K5 PRO Viscous Thermal Paste for Thermal pad Replacement" for VRM's and chokes. Clean off the old paste using isopropyl alcohol for CPU & GPU. Use Q-tips without the alcohol to remove the old K5 Pro paste. If some of this paste falls on the motherboard, it's impossible to thoroughly remove it. It's not a problem, since it's non-conductive and won't short/damage your laptop.Removing the fan requires you to unscrew 3 black screws from the fan housing. Note, these are tiny and can get lost in your carpet. Take out the old fan then insert the new one in, so the tab clips in. Then, align the screw holes and screw it back in. As you put the heatsink back on, you must plug in the GPU's fan first then screw it back on. You don't want to over tighten the screws. I screw it in lightly and stop once I feel it start to get tight. If you screw it all the way in, you'll need to unscrew it a little bit.The new fan works great just like the original. If you want 0% fan speed aka real silent mode, you go to "user scenario" then "user" then "advanced" for fan speed then click the gear icon. You'll see a scale for CPU & GPU. Set it to 0%, 5%, 10%, 15%, 20%, and 25%. It's normal for the CPU fan (fan #1) to randomly ramp up and down once in awhile. This is good for surfing the web, typing notes, and watching videos. For everything else, you must use "silent" (locks both fans to ~2400 RPM), balanced, super battery, or extreme performance.
B**.
Works Great
Swapped out the OEM fan, which was dying, quickly and easily in an MSI gaming laptop. It's been almost six months and has worked perfectly so far.
J**E
Only came with one piece...
I thought it came in a pair...
S**E
Slower speeds, misaligned holes
Well I mean they work, but they are much slower than the stock MSI laptop fans and don't seem to get as much air through, the holes are also misaligned but that's a minor issue.
S**R
Great item for DIY
Last time this fan went out in my son’s computer, it cost $200 for the repair. This time we decided to try fixing ourselves. We had to buy the laptop tools for $10.89https://www.amazon.com/gp/aw/d/B015CMAJVK?psc=1&ref=ppx_pop_mob_b_asin_titleOver all we saved $157 after watching a how-to video. Great buy!
Trustpilot
2 months ago
1 day ago