Desert Online General Trading LLC
Dubai, United Arab Emirates
Desert Online General Trading LLC
Dubai, United Arab Emirates


🔧 Secure Your Space, Elevate Your Outdoors!
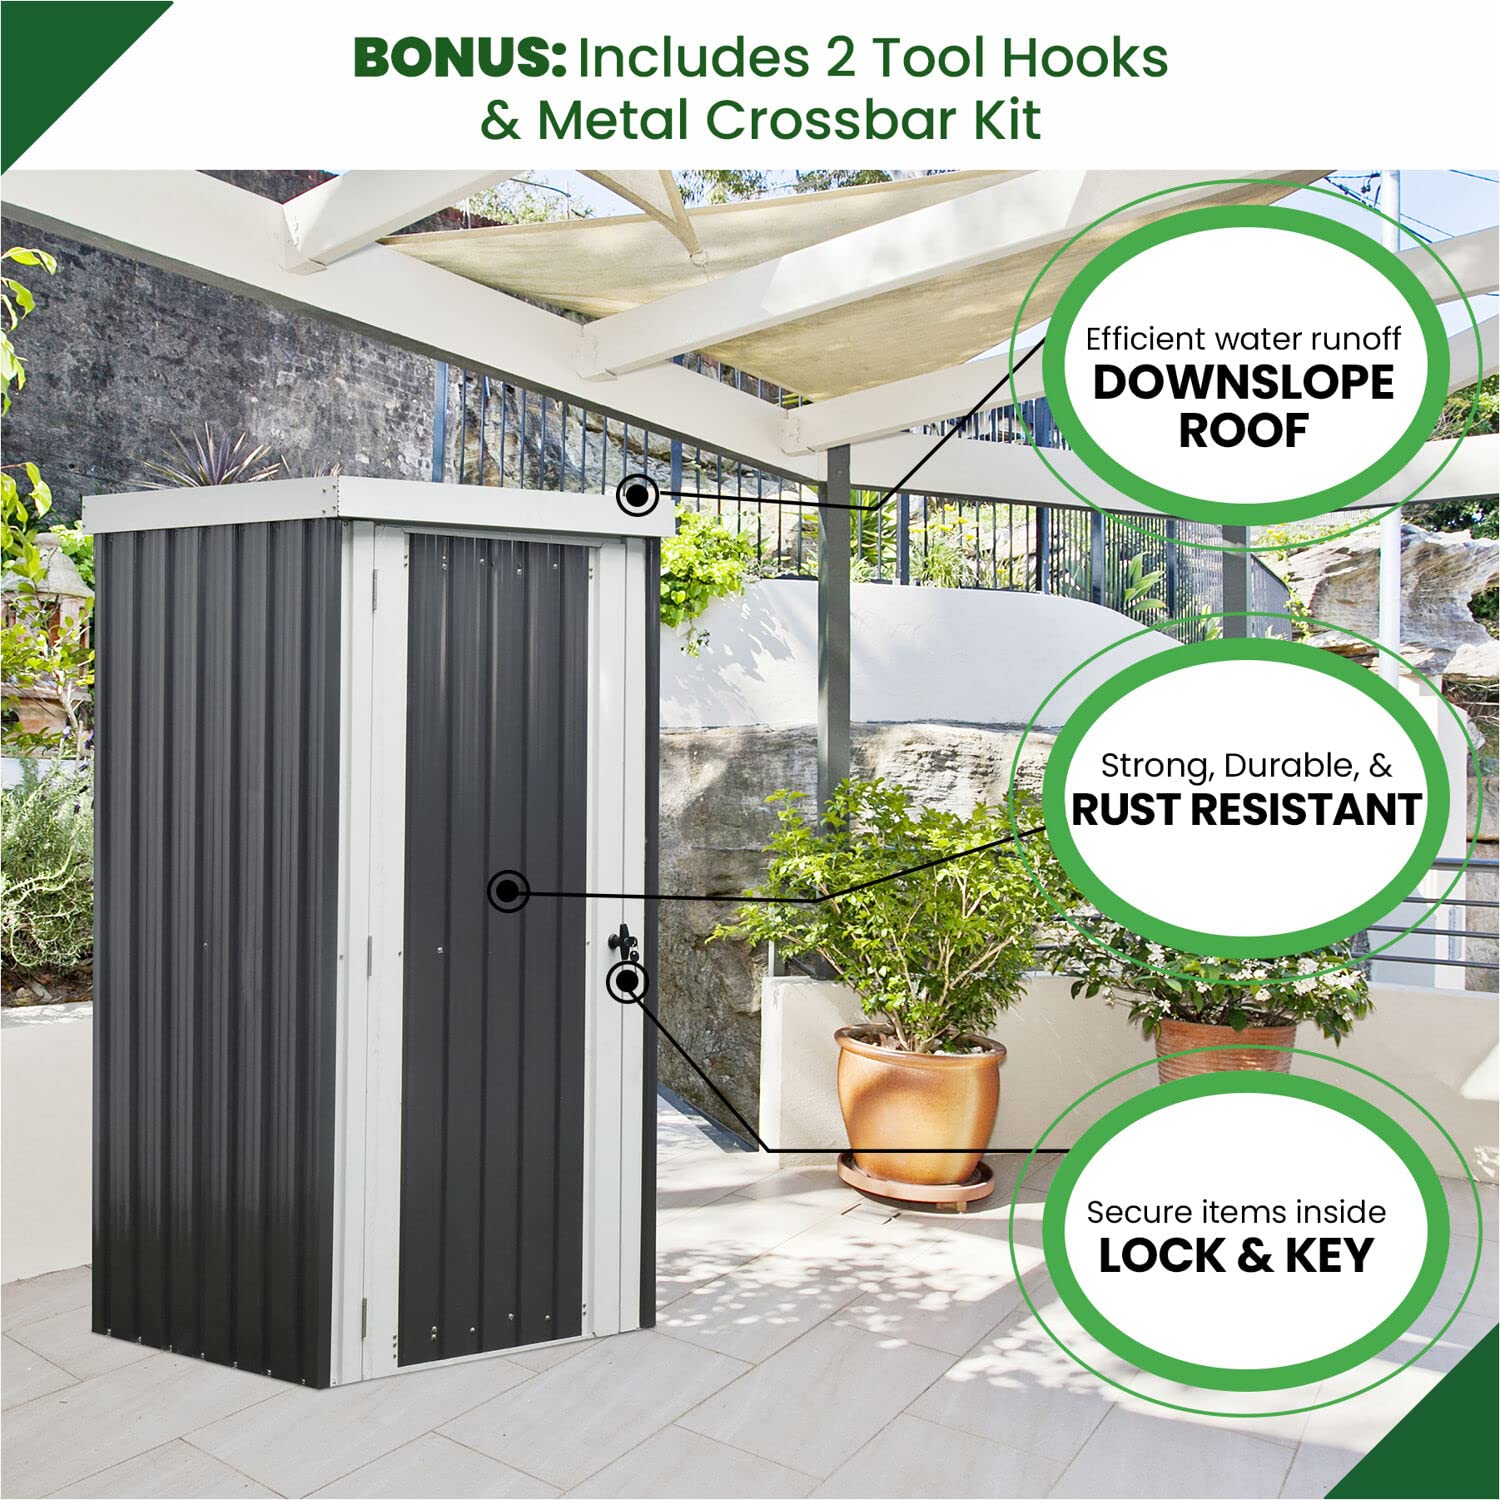
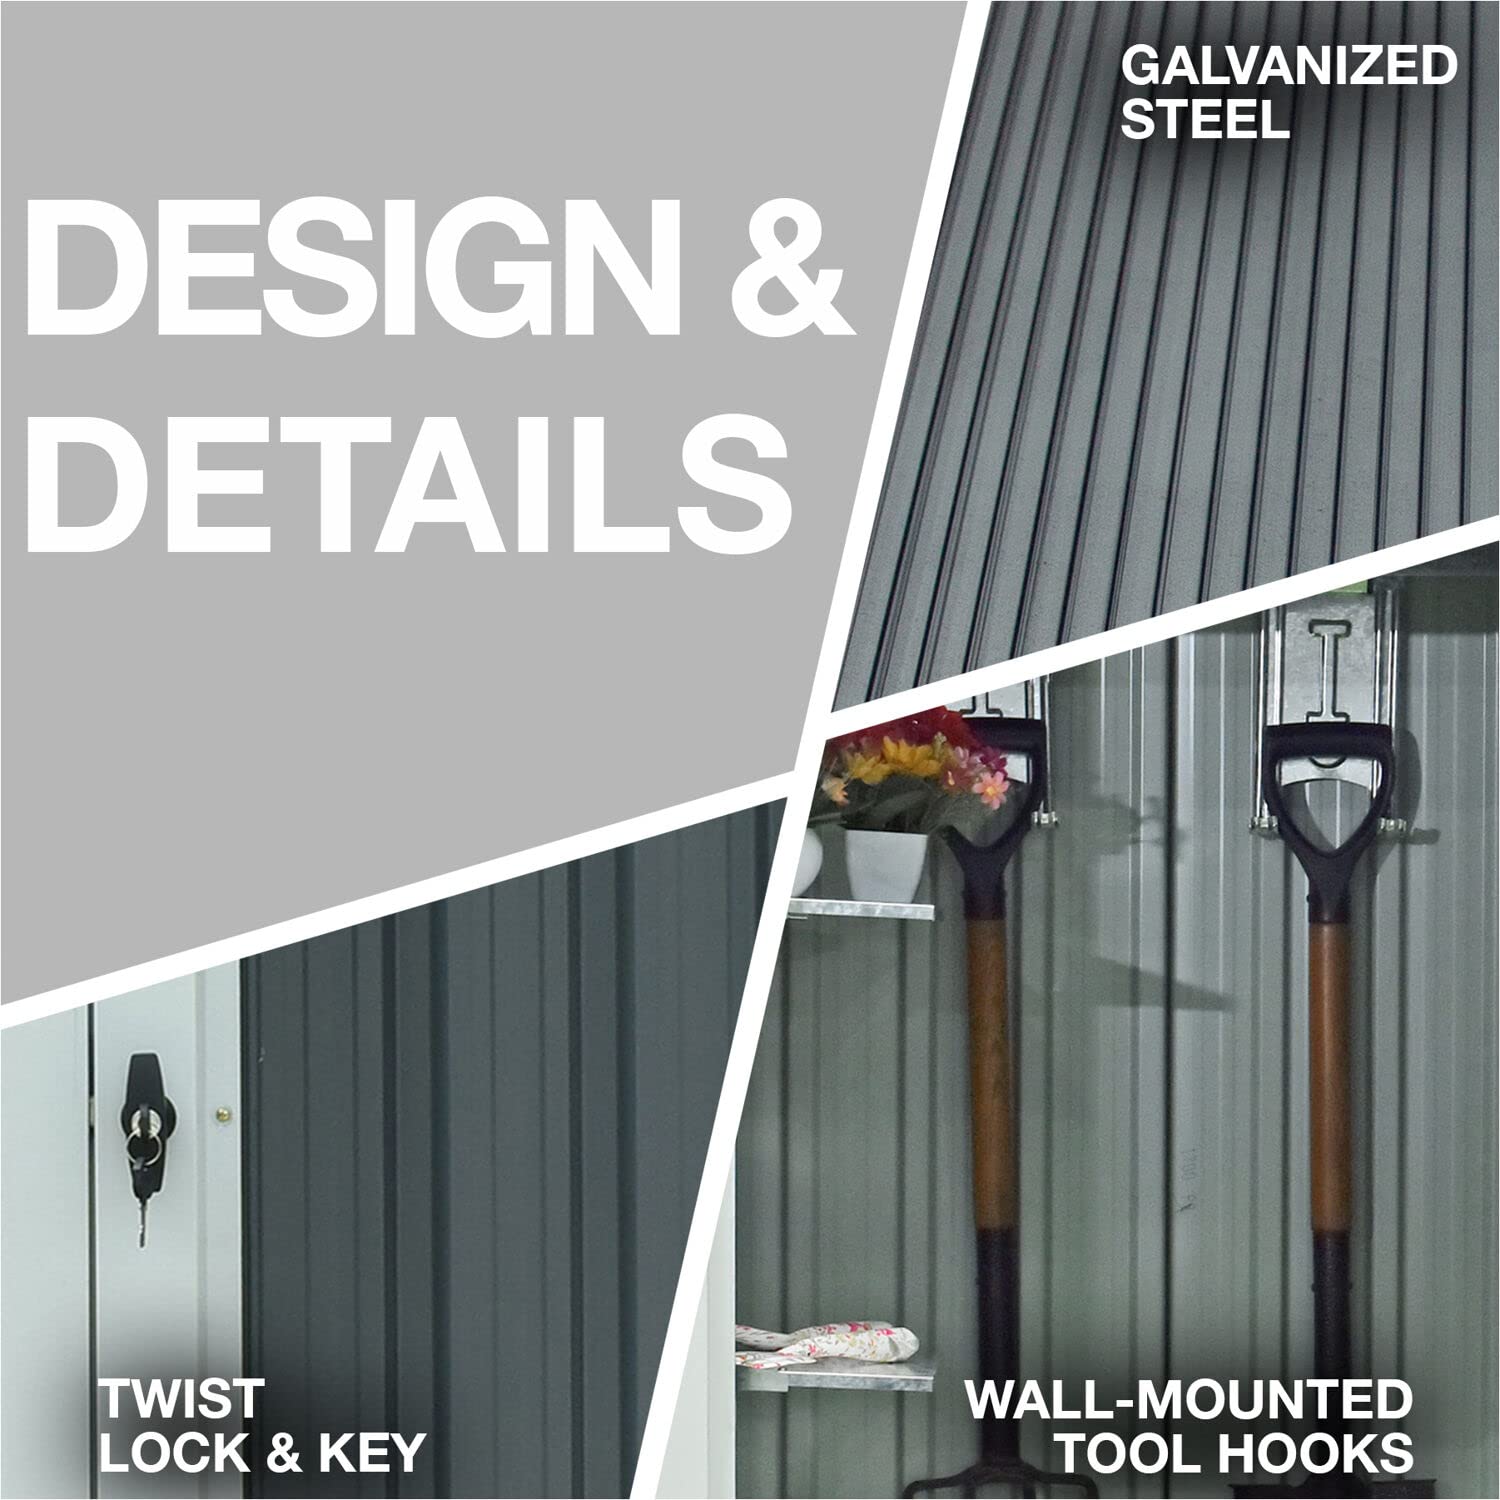
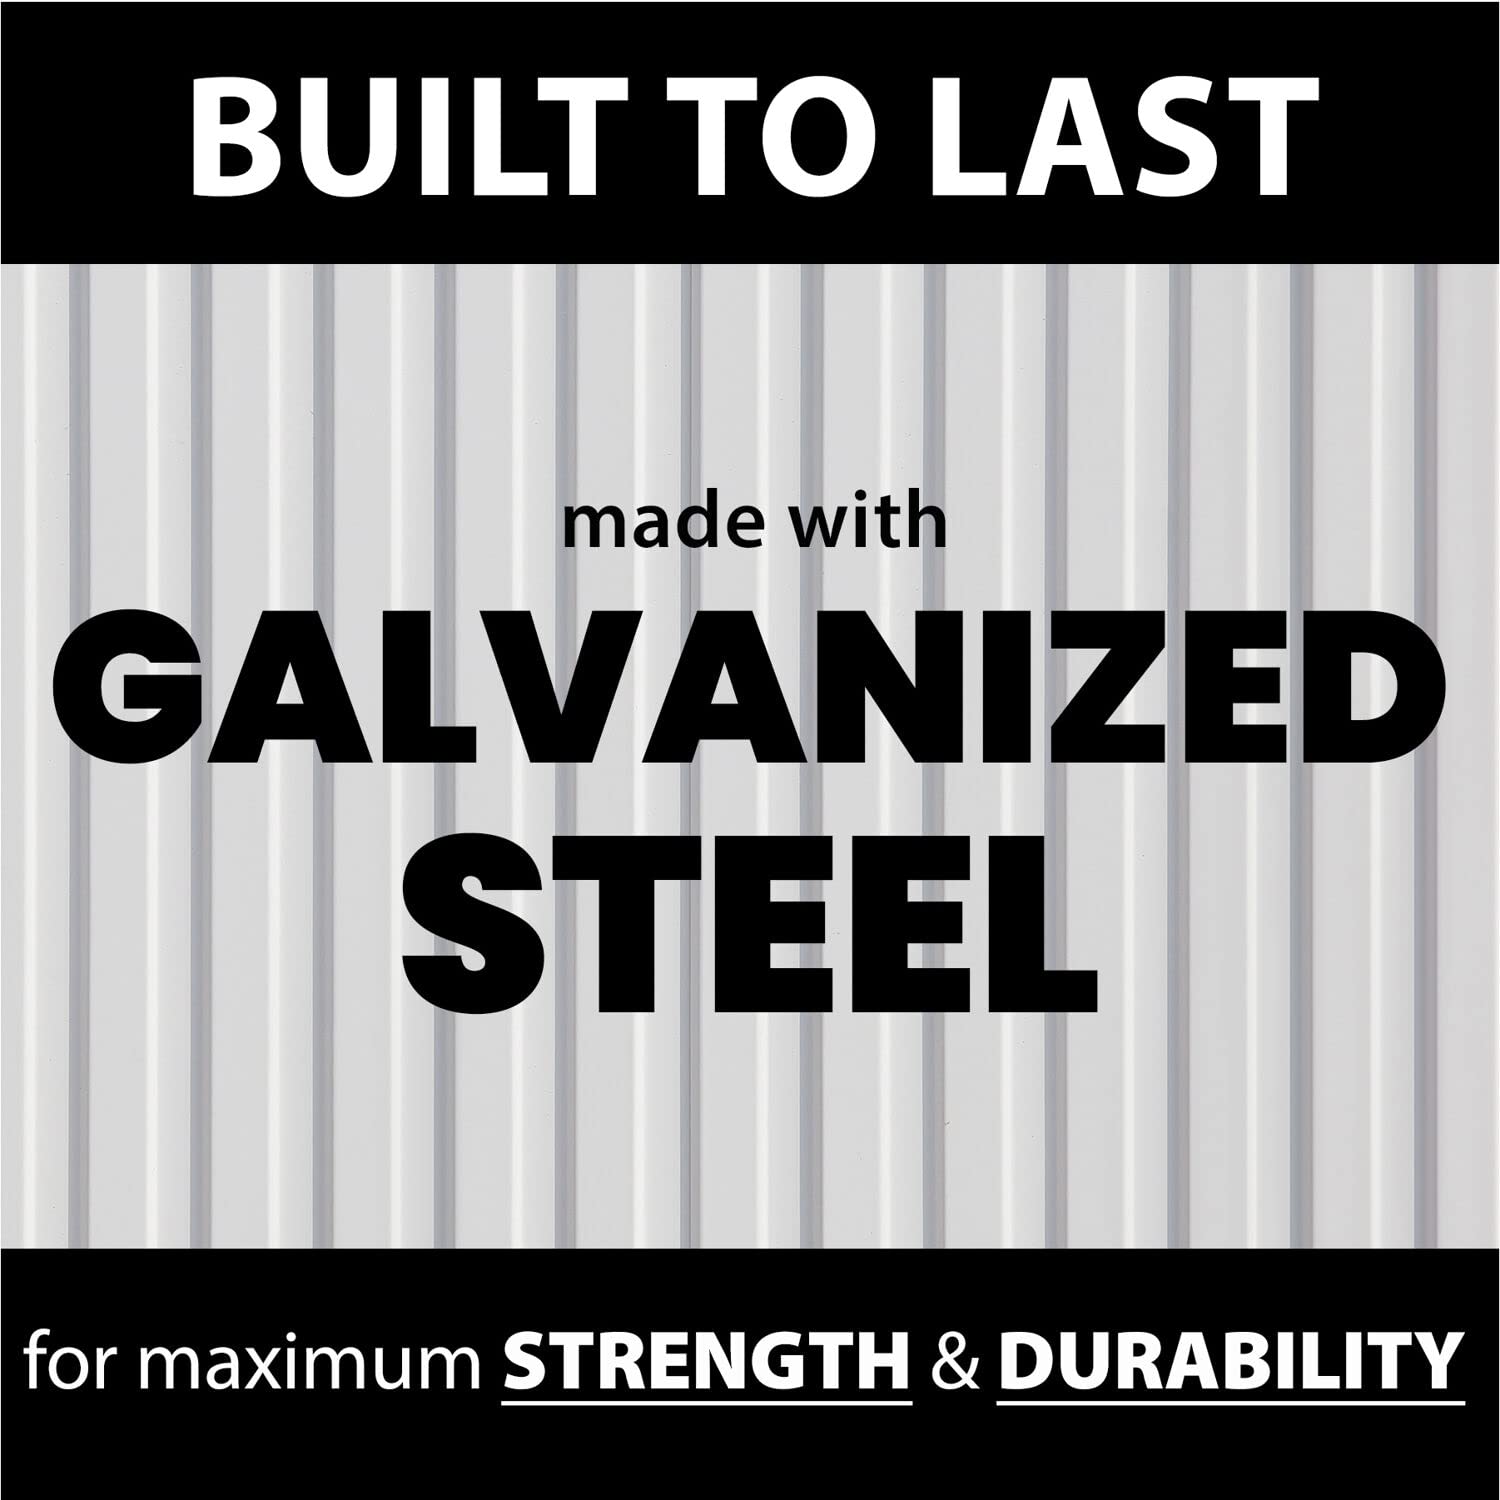
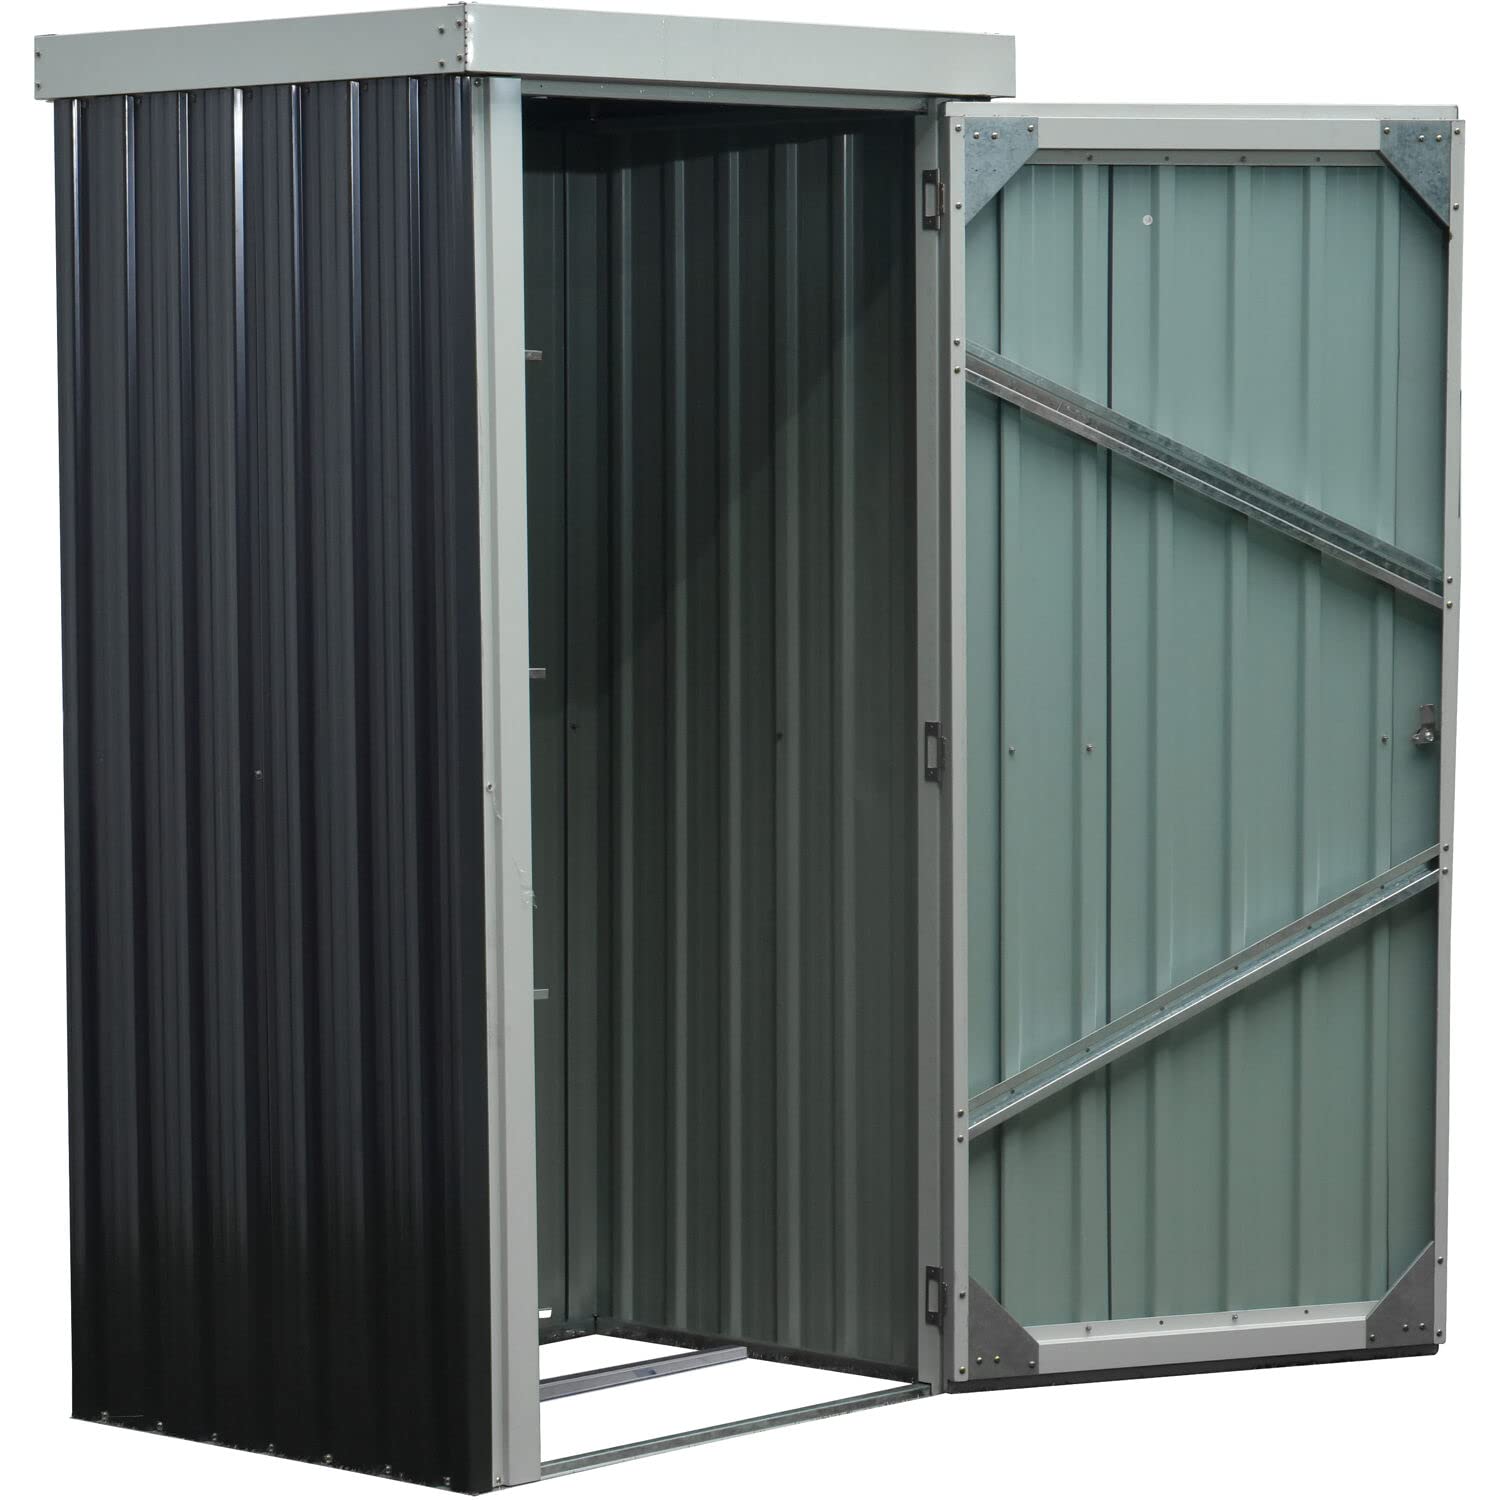
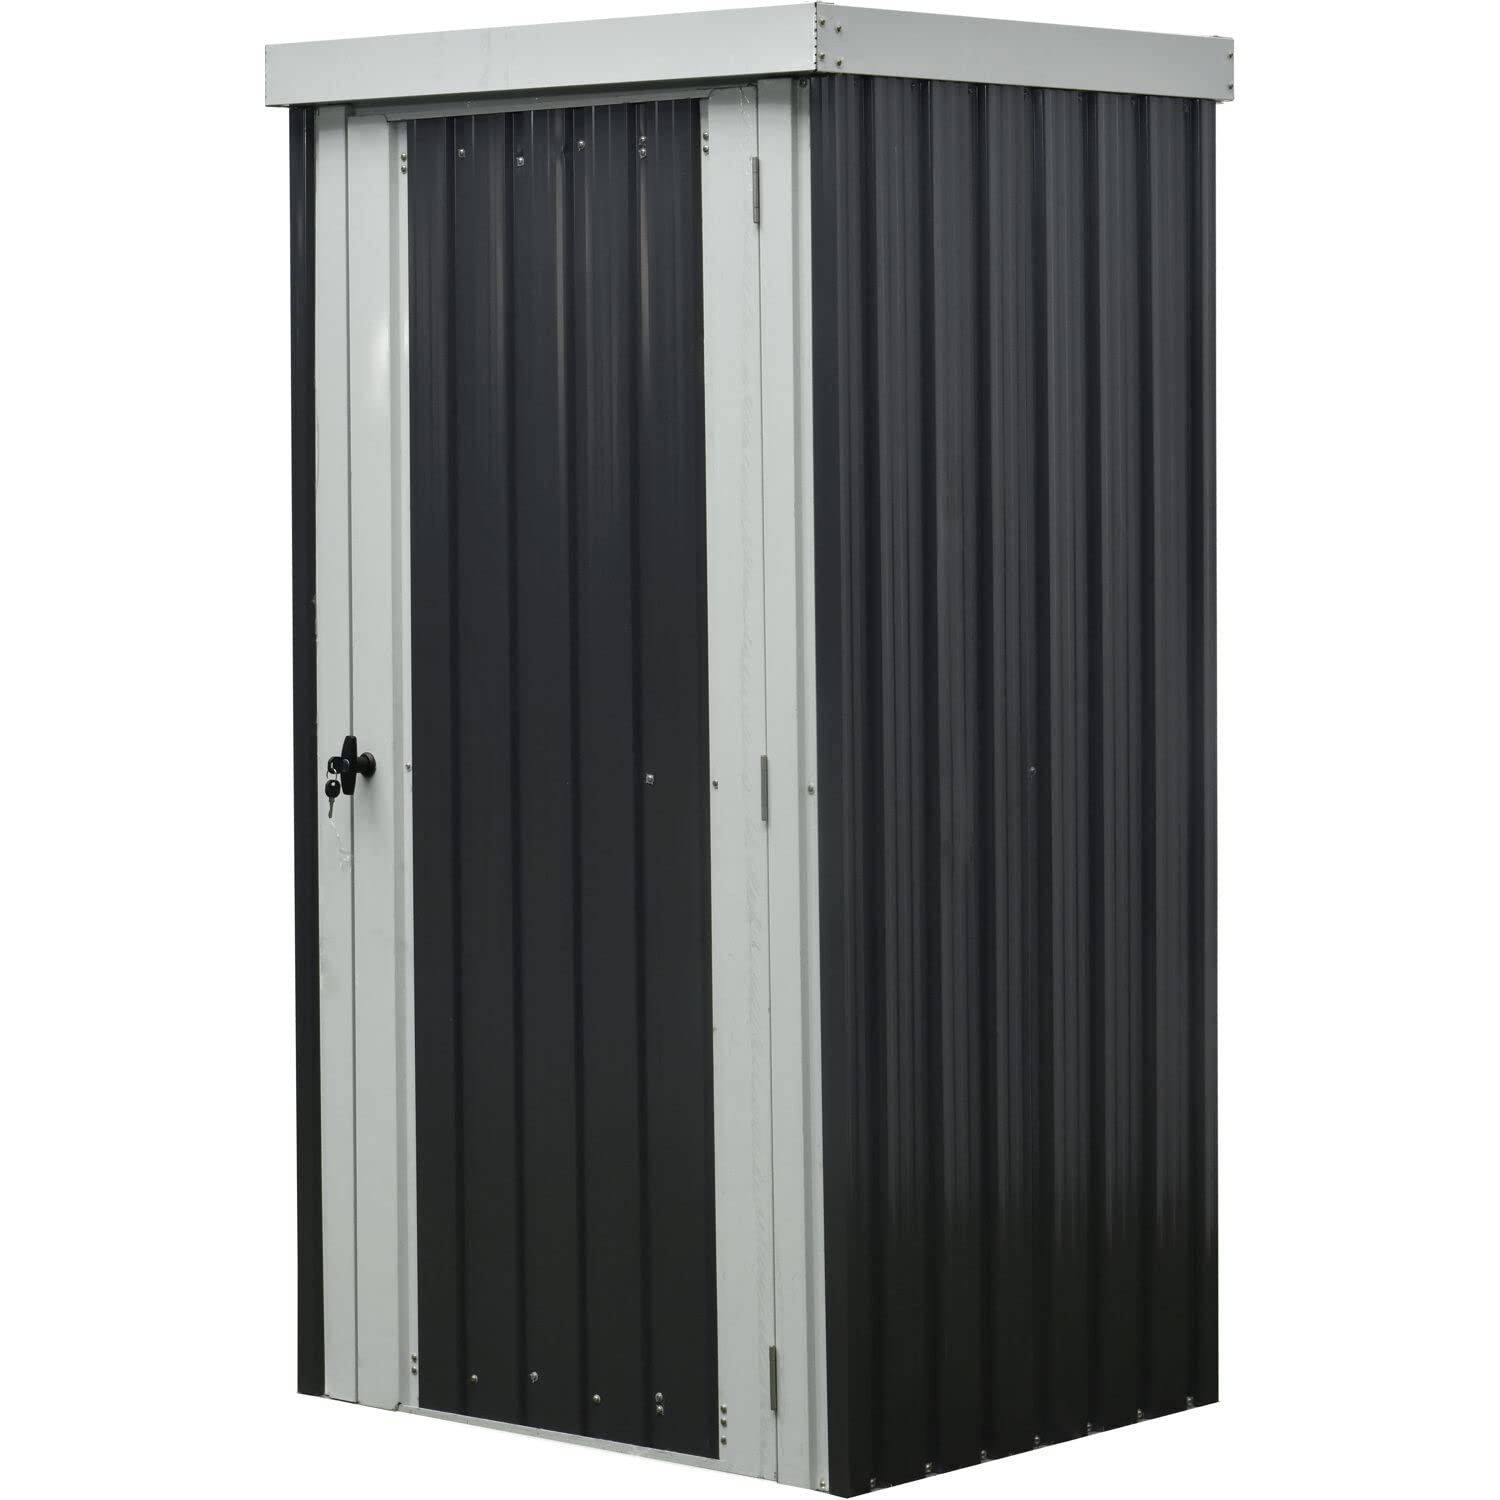
The Hanover Galvanized Steel Single Door Patio Storage Shed is a robust outdoor storage solution designed for year-round use. With a rust-resistant, fireproof, and water-resistant construction, this shed ensures your garden tools and supplies remain protected from the elements. Featuring a secure twist-lock door, efficient rainwater runoff design, and included tool hooks, it combines functionality with modern aesthetics, making it an essential addition to any outdoor space.


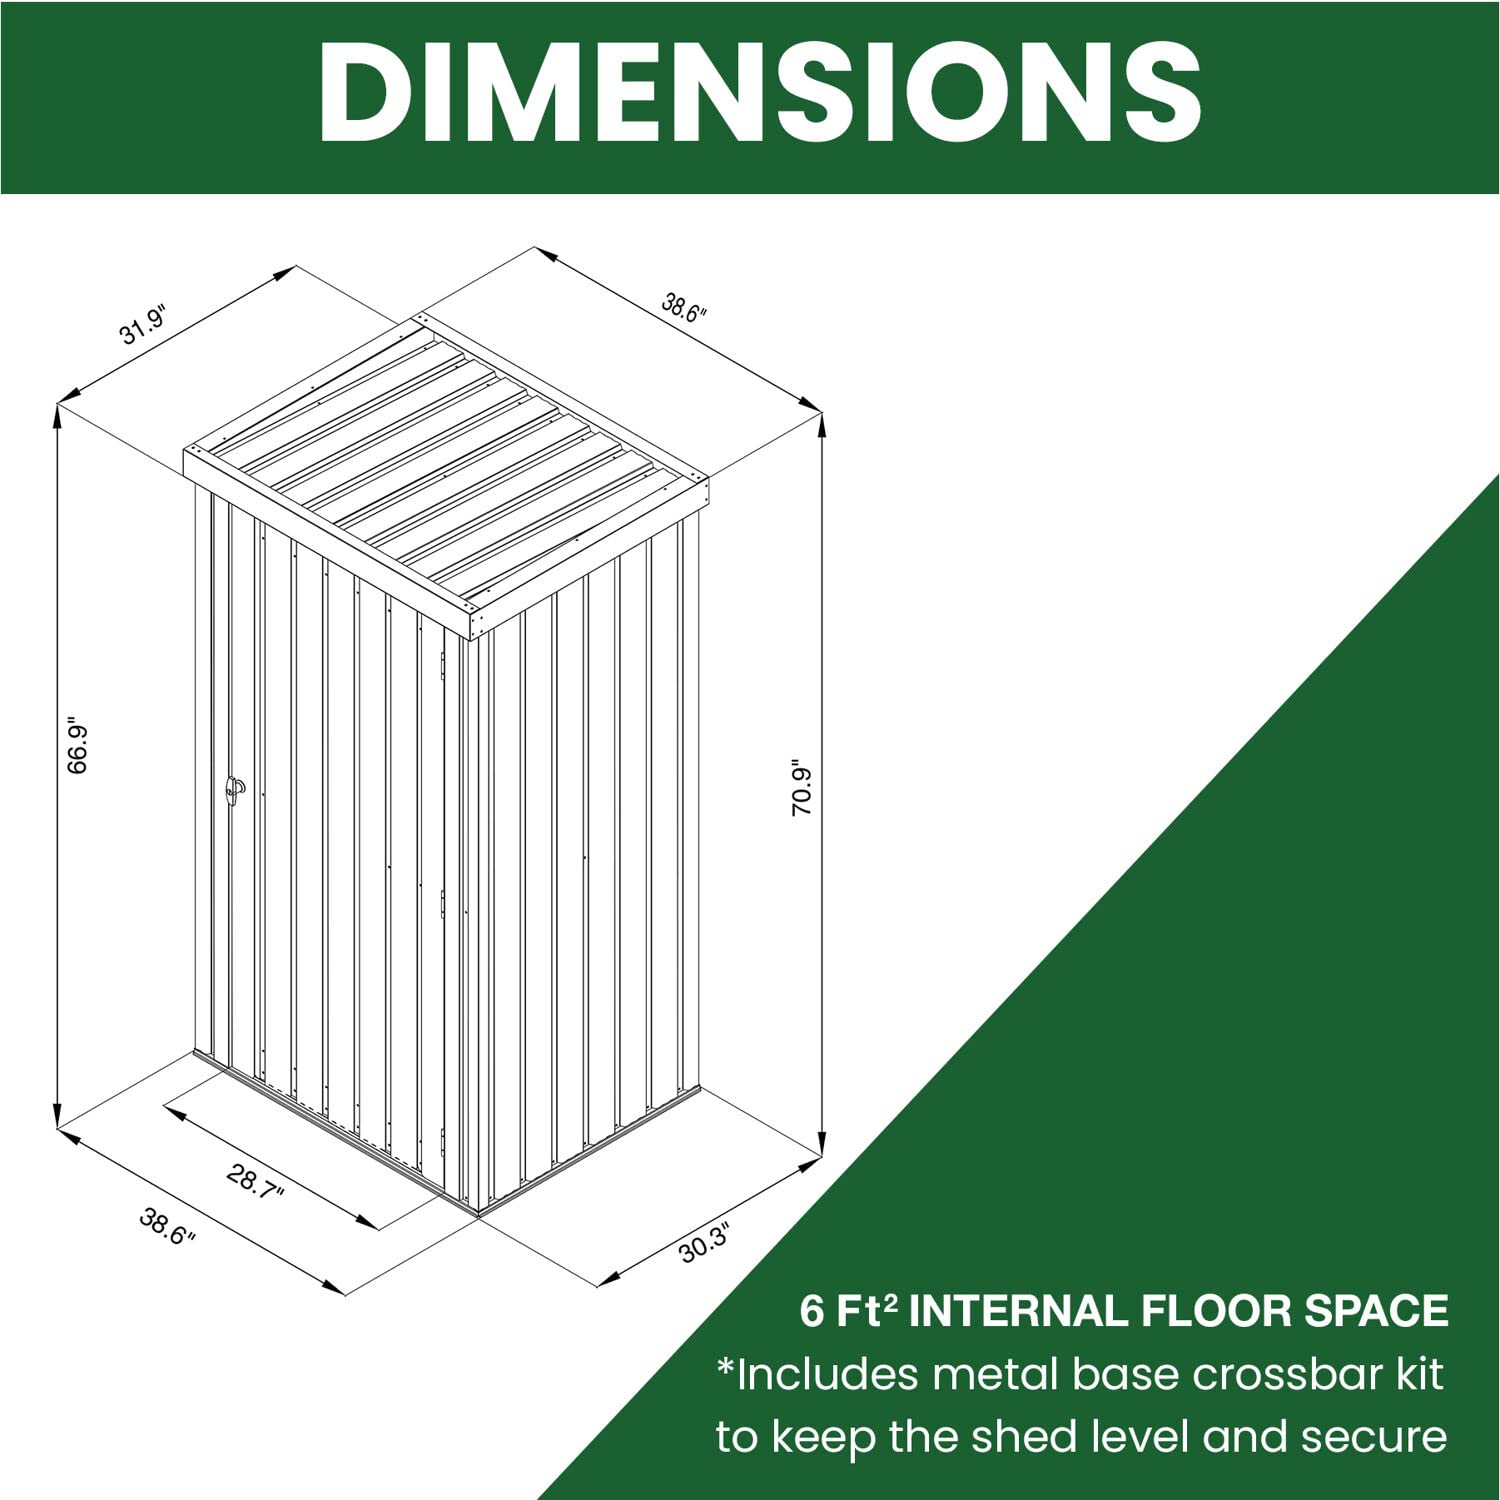
| Chamber Width | 2.75 Feet |
| Door Width | 28 Inches |
| Door Height | 65 Inches |
| Chamber Depth | 2.25 Feet |
| Chamber Height | 5.25 Feet |
| Item Dimensions D x W x H | 31.9"D x 38.6"W x 70.9"H |
| Item Weight | 76 Pounds |
| Style | Steel Patio Storage Shed - 1 |
| Door Style | Single |
| Color | Gray |
| Top Material Type | Alloy Steel |
| Frame Material | Alloy Steel |
| Base Material | Metal |
| Material Type | Alloy Steel |
| Is Assembly Required | Yes |
| Ultraviolet Light Protection | Yes |
| Water Resistance Level | Water Resistant |
N**O
Good wood rack
So first I have to say the assembly instructions are horrible. Had a buddy who is a fitter and reads prints daily help me and he had trouble with the instructions. It basically two pictures that barely shows anything and no instructions on how to put this thing together. Took us two about 4 hours of figuring it out to get it together. Other than that it’s a nice metal shed for your split wood. It’s not as sturdy as if you build out of 2x4s but for a metal shed it’s sturdy once completely assembled. My box was damaged and some of my sheet metal was bent in spots but it wasn’t horrible and not worth returning. It will do what I need it for. It’s not perfect but for the price you can’t beat it.
R**S
Ridiculously complicated to assemble
We ordered this shed in August 2021 and just completed assembling it in June 2022. The first indication of trouble came when the package was delivered by FedEx, and as the box was tipped up, a noise like rain came out. Hundreds of screws were loose in the packaging and ran down the aluminum panels. We unpacked and laid out the pieces, and found that the main panels for the doors were severely bent and one strut piece was missing. We sent pictures to the manufacturer and asked that those two pieces be replaced. After a month or so, we received a package with the two door panels but no strut piece. We sent three subsequent emails requesting the last piece, and eventually received the final piece in May 2022.As for the assembly, the shed is composed of thin aluminum panels with hundreds, if not thousands, of screw holes. The assembly process is very slow and laborious, and the instructions are not clear. It took me and my son, fortunately a patient mechanical engineer, three days to assemble the shed. For the winter, we had to leave the shed open with no doors, and to be fair it did weather the winter quite well.I would not recommend buying this shed unless the manufacturer redesigns it to make assembly easier. Also, their customer service is atrocious.I have attached a photo of the bent door panels and the completed shed.
A**R
Great little shed for the Money
This little shed is a great value for the money. I assembled by myself in about 5-6 hours total. It come in a box of a million pieces,like something from IKEA, but if you have a drill and locking pliers or an adjustable wrench, you can knock this out in a half day. the picture is not to scale of the assembled item. its smaller than it looks in picture. I would have bought a molded plastic shed like that is easier to assemble and is larger, but my HOA doesn't allow those to be seen above my 6' fence height. if you don't have those restrictions and have a little extra cash then i would not buy this personally. if you pull the trigger Just make sure you do the following:-wear gloves.the metal is sharp, it will slice your hands up without you knowing until after the job is done-Make sure this is constructed on level ground like a slab or wood. if the shed isn't on level ground then i could see this being constructed the wrong way or holes not lining up.-set out all of the pieces before the job starts so you know where each piece is as you are following assembly instructions.-This would be very difficult to assemble without a power drill/screw gun.-Get thin weather stripping to seal doors really good-there are some tight spaces you need to install doors you will need a small adjustable wrench to install-Don't even think about trying to assemble this on a breezy/windy day by yourself. its not happening, wait til you have someone else to help you or wait for a calm day.
M**E
Extremely Frustrating & Time Consuming to Assemble!!
Metal garden shed – This is an attractive shed, but ridiculously tedious to assemble. Following is a page by page commentary of the assembly directions:1. “Before you start” assembly instructions states this unit will take 2 people about one full day to complete. I had help when it was necessary to hold flimsy metal panels up while screwing bottoms into base rails and to hang doors. This shed would be easier to build and more sturdy if it was designed with a metal frame.2. “Sharp edges” has warning to wear gloves. Yes the edges are sharp and I got several minor cuts. Statement is here for liability purposes. Ridiculous! One can NOT wear gloves and handle the tiny fasteners provided, especially when trying to hold tiny sheet metal screws in place to start them.3. Parts list. Components – 78 including door hardware; fasteners – 452 screws, bolts, nuts, washers; 90 unused plastic things that look like drywall anchors. 620 total pieces.4. Assembly instructions are pictures only with enlarged details and an occasional illustration. Some inconsistencies.5. “Base assembly” warns to square the base up (makes sense) or holes won’t align. I’m pretty sure the shed is fabricated or 3-D printed from the design program because the slightest of irregularity will cause a mismatch and a very slight mismatch causes trouble with the fasteners (sheet metal screws). No cross frame provided to maintain square. No floor.6. Note on the sheet metal screws: if started wrong, or holes are slightly off, the threads seem to strip; I used a package of #6 X ½” screws (slightly less diameter) for my rescue fastener. I also noted that you need to angle the screw a bit, instead of straight in, to start them easily. Chinese steel?7. Wall assembly. No frame means you start by screwing in the bottom of each flimsy wall panel, starting with corners, while someone holds the whole thing up. I secured the tops with small gauge bolts provided to temporarily hold things together until instructions took me to top assemblies then removed them for the final fastener installation.8. “Door post installation”. The light colored portions, like door posts, have a factory applied protective coating that is a pain to remove. I removed it first, thinking it would be impossible after assembly. There is a technique (discovered towards the end). Nowhere in the directions is this mentioned.9. About the finish: very thin. Any little bobble leaves a scratch.10. “Left and right upper beam installation” finally adds the top frame, including flimsy gable ends and a center beam. One would think this would stiffen the assembly up, but no.11. Center beam. Oh, yeah. Figure out, rotate, turn, twist…two pieces together to make one piece. Why can’t the thing be made and shipped in one piece?12. The roof finishes off with edge angles (flashing gauge) and a center cap piece. You have to remove some roof screws to attach the center cap. Dumb.13. Door panel assembly….then, “Right” door panel assembly. Looking ahead you glean that the first door panel assembly must be the left door. Ha.14. Doors. Umpteen of the 620 pieces are in the doors. Once together they are sturdy. You would have to keep them closed to keep the thing from blowing over. I have it anchored to the host floor deck and will install a wood frame for interior shelving (there isn’t any). There are two tool hangers shown for the back wall which I installed on the sides so I can build shelves along the back.15. The last page has a “Fundation” (sp) installation. There is a center base beam that was shipped separately with a separately bagged shipment of corner braces! I put it in when assembling the base frame. I don’t know how you could slide the ends into slots otherwise.16. Five days later I completed the shed. OK these were not 8 hour days and there were interruptions, including some weather issues that caused stops and starts, even moving door installation to inside. I'm a DIY person; over 50 years have assembled a lot of furniture and other items so this is not my first rodeo. I would guess a retail store crew could do it in a day.
Trustpilot
1 week ago
2 days ago
1 month ago
3 weeks ago