Desert Online General Trading LLC
Dubai, United Arab Emirates
Desert Online General Trading LLC
Dubai, United Arab Emirates


🌟 Block the light, not your style!
Full description not available


J**R
An Outstanding Product - If You Install it CAREFULLY. READ...
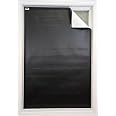
The Blackout EZ is a product that is so simple and obvious that I should have come up with it years ago. I didn’t, but fortunately Tim Stanley did. Unfortunately, it took me years to find this elegant solution to a vexing problem – how to make my bedroom as dark as the grave. This is, of course, speculation. I have never occupied a grave, not do I know anyone who has. It just seems like a place that would be pretty dang dark.I installed the product at night (Pro-tip: do it during the day. It is easier to check your results), and it easily sealed out the light from the streetlamps. The room got so black in fact, that I spent the next 20 minutes walking around with a flashlight and gaffer’s tape (you MUST own a roll of this stuff), taping over all the annoying LEDs on audio and video devices, surge protectors, and even my air filter system. The digital alarm clock was my one concession to total darkness of obvious reasons. a bit of light in my otherwise black room. I knew the product was very good because It was never dark enough to notice these evil lights before.But the real acid test was the bright and shiny morning of the following day. What a huge difference between the light elimination achieved using the Blackout EZ system vs blackout blinds and blackout curtains. There was still SOME light, so for those who seek total deathly blackness, read on.Sneaky light sources:• The aforementioned LEDs, LCDs, etc. You will notice them. I promise.• Doors. The bedroom door was leaking light all around the edges. It was like looking at the sun during aneclipse. I believe I solved the problem, by installing weather stripping around the frame and a door sweep onthe bottom of the door.• ANY defects in your installation.Install your Blackout EZ, and on the brightest day, turn out your room lights and go light hunting.INSTALLATION-------------------Installation was fairly easy and mostly error-free, with some caveats. Chief of these is if you want perfect light elimination, you must do a perfect installation. There is no room for error. Leave even the tiniest gap between the Velcro strips on either the vinyl or on your window frame, and you will have a leak. Remember, light is very, very small and clever. Leave a pinhole, and the sun will find it.Precise measurement is critical. Metal tape measures are error-prone because at the end you must bend them, and then guesstimate the exact measurement. I think an accurate fabric tape measure would be better for measuring the window. I’d recommend including one in the kit. They are cheap when bought in bulk.The grid pattern printed on the vinyl is a great idea, but not very well executed. I have good vision, but had a hard time reading the numbers and following the lines. A light shining on the vinyl at an angle will provide you with the best view of both numbers and lines. I would recommend that the manufacturer either print the numbers and the pattern more boldly so it can be more easily viewed, or have the numbers printed on a scored, tear-off strip that can be removed before mounting to the window. Also, I don’t know if it was the intention to have the numbers correspond to a ruler, but at least on my Blackout EZ vinyl pieces, they did not. Trust your measurements and make a mark on the edge of the vinyl with a sharpie or an ink pen using your measuring device. Take your time cutting the vinyl, since you will only have one shot at this. If you really lack confidence, favor cutting a bit wider than being exact. Before you apply the Velcro, you can always trim off excess material, but if you cut too short, you’re screwed.When doing your cutting, use sharp scissors, and preferably long ones. It takes a lot longer than you think to accurately cut over 40 inches of material with a set of tiny sewing scissors. The manufacturer might want to offer a pair of decent scissors as an option during purchase. Never hurts to have good scissors in the house. Just don’t run with them.If you’re not a vampire, you are likely trying to darken a bedroom – not your entire residence. DO NOT make the mistake of trying to measure or cut the vinyl on the bed, or applying the Velcro tape on the bed or on a carpet. You will be off. Remember that light is completely unforgiving of gaps. Leave a gap between the Velcro adhesive and the vinyl and you will be very unhappy. It is much easier to be precise on a large, hard table or smooth floor. A dining room table is ideal.Apply your Velcro strips – on both the fabric and window – exactly edge-to-edge. Do not overlap the strips and do not leave gaps. Again, this is easier to do when you are working on a hard surface. What I did was to intentionally cut the strips a few mm long, and then snip them to size before pressing the end of the Velcro down. There isn’t enough extra Velcro in the package to start again making another strip. Also, cut the ends at a 90 degree angle, again to avoid gaps.A note before sticking the Velcro strips to your window frame. You also need to prepare the surface first. Windows have a way of attracting dust, gunk, paint drips and insect carcasses. Again, given the unforgiving nature of light, the Velcro application on your window frame must be perfectly smooth and flat. You might have to take a putty knife and scrape the area to which you are going to apply the Velcro strips in order to remove any gunk or bumps. To ensure proper adhesion to my vinyl apartment windows, I used rubbing alcohol pads to make sure that the surface was clean. That is another item I would include in the package. They are cheap.When everything is mounted, attach the top of your Blackout EZ to the top Velcro strip on your window frame. Make sure it is centered. Then smooth the sides down carefully with your fingers so that the Velcro strips fully mate with their counterparts. Make sure that you don’t leave any gaps. I PROMISE you will see them when the sun wakes you up. This is another reason to do this during the day. Continue and then press down the bottom strip. Then go over the whole thing again.I’d love to see some solutions to common problems like going around a window A/C unit in the summer and sealing the window completely in the winter. Perhaps having two panels is the answer. I’d also like to see the additions to the kit mentioned above. Lastly, I would avoid stapling the plastic ends of the shipping tubes. I got a nasty cut from one of the staples. The fiber tape will work just fine.Please do take me seriously about the night-table lamp. Do this job right and you won’t be able to see your hand in front of your face.This is a great product that, at this point, I give 98/100.P.S. I have been reading concerns regarding the "off gassing" of the vinyl in this product producing odors and toxic fumes. As it is still winter, I haven't been able to evaluate this concern. I will update my review over the summer. This issue wouldn't be specific to this product per se, but may be more of an issue as one side of the fabric faces direct sunlight. Keep in mind that vinyl is used in everything from windows, to floors, to couches, to car seats.
B**L
Actually works!!!! So great...finally!
Excellent, simple product that actually works! Very fast shipping! For years I've tried different options to black-out the windows in my bedroom to sleep better, but nothing has ever fully worked. The last thing I've had (for several years) was black foam-board Velcroed to each panel of glass. The foam board warped and shrunk somewhat over time and always still let light in around the edges and cracks where it did not fit perfectly to the frame. And "blackout curtains" that I tried never worked - either they did not really black-out light at all and/or they would always let light in around the edges. After a lot of searching I thankfully found this, although I really think they should change their primary picture here on Amazon. Currently (6-2015) it shows the packaging tube, some of the vinyl and the Velcro strips they provide. When browsing through I did not realize this was a window black-out product, I thought it was one of those search-fails on Amazon where some completely unrelated product is shown, but luckily I dug a little deeper! Installation is a breeze with the provided Velcro strips and instructions. The grid lines on the black side of the panel are a huge help with cutting it straight (not shown in the pictures) and are barely noticeable when mounted to the window - they are faint grey lines that provide guidance with cutting after you make your measurement. I was surprised with another review that mentioned odor - there is no or nearly no odor at all with this item. In the past I've purchased shower curtains that literally stunk up the whole house, but this item has no odor unless you put your nose right up to it and even then it's very faint...just enough to let you know it's new!! I have not seen a sliver of light at all. In fact it surprised me to walk in my bedroom when it was fully sunny outside and this solution kept ALL light out! And it works great under my current blinds. You don't even know it's there unless you raise the blinds. And I really like how I can remove it on weekends, fold it up, and store it away to let some light in - and the white part of the Velcro that stays on the window frame is barely noticeable if you have white painted windows - you really have to be looking for it to see it . The only thing I would mention is that the Velcro that stays on the window is high quality and sticks very well, but if you're like me and have a bad paint job on your windows, it will pull the paint off when you remove the blackout panel from the window (this is a problem with my paint and not the product). The previous owner of my house put a thin coat of contractor grade sprayed-on paint on my windows so the Velcro wants to peel off this crummy paint and stay with its mate on the blackout panel rather than remain on my window frame. So I might tack the Velcro on with a few staple-gun staples (hate to do that to the window frame though) or just remove everything and repaint the window properly with good paint. Overall excellent product!
Trustpilot
3 days ago
4 days ago