Desertcart purchases this item on your behalf and handles shipping, customs, and support to Ireland.
🖤 Stay informed, stay stylish—without the power guilt.
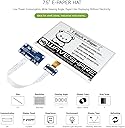
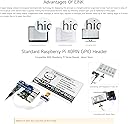
The Waveshare 7.5 inch E-Paper Display HAT V2 is a high-resolution (800x480) e-ink screen designed for Raspberry Pi, Jetson Nano, and STM32 projects. Featuring ultra low power consumption and a wide viewing angle, it maintains clear, persistent visuals without electricity. Its embedded controller and SPI interface simplify integration, while onboard voltage translation supports both 3.3V and 5V systems. Ideal for smart home dashboards, industrial instruments, and shelf labels, it includes development resources for quick deployment.


| ASIN | B075R4QY3L |
| Best Sellers Rank | 55,252 in Computers & Accessories ( See Top 100 in Computers & Accessories ) 87 in Barebone PCs |
| Guaranteed software updates until | unknown |
| Item model number | 7.5inch e-Paper HAT |
| Manufacturer | Waveshare |
| Product Dimensions | 18.01 x 10.01 x 8.99 cm; 100 g |
T**N
Great product. Very happy with this purchase!
I brought the screen having done a little research and got exactly what I expected! I'm using it to display a screen of information such as weather, news, local train times and the temperature in my home which updates every five minutes. I found it pretty easy to use a Raspberry Pi Zero WH to drive it using code based on the samples WaveShare provide online. The only disappointment is that it does not support partial screen update, as far as I can tell. It doesn't take too long to update the screen in full though, and my application is not time critical, so all good.
C**S
Using it as epaper dashboard
Very happy with this screen. I have the first gen screen and I've been using it for about 5 years now as a weather and calendar dashboard. I have the Waveshare 7.5 Inch V1 from many years ago. Just search for simple waveshare epaper dashboard by mendhak. I've attached it to a RPI Zero, and put it in a picture frame. The screen doesn't take too long to refresh, it used to be 30 seconds but the latest code brings it down to less than 10 seconds.
N**V
Spent ages trying to make it work
This is a great display, but far from intuitive and their wiki is crap!... I wanted to make it work with an SAMD Arduino board and tried to follow the instructions on the wiki, but the instructions and the example is for Arduino Uno and their example doesn't even compile for an SAMD board (says 'Epd::' qualifier not necessary, just removing it compiles nicely though). The wiki says you should set display config:A and interface config:1, but I couldn't get it to work, I could only get it to work with the opposite settings. Also, you have to figure out the wiring for yourself (I did for my MKR WiFi like this: 1010 VCC-VCC, GND-GND, DIN-8, CLK-9, CS-4, DC-7, RST-6, BUSY-5), and find the place in the code where these need to be updated by yourself too. Even then it sometimes works and sometimes doesn't... not sure why. There's a GxEPD2 library for Arduino that allows partial refresh and has some gray-scale looking images (just lower density of BW pixels), but again it took me hours to figure out what to uncomment, particularly the line with the "2ms" reset pulse...
K**_
Looks amazing when its new - Faded after 4 months.
Great screen when it is new, nice and dark clear text/images. After 4 months use the screen is now fading, it is worse at the top. The writing/images are grainy. I doubt it will last much longer. Waste of money.
A**B
Problems but Waveshare helped.
Rating 4* because waveshare helped with it.
A**B
Fine Screen, Irritating Setup, No Documentation
The e-paper display is clear, if a bit reflective and slow to update. However it completely suits my needs. It's very thin and can easily be mounted in a frame. The product came on time as well, securely packaged in a foam inside. However I have to criticise the documentation provided. Currently the HAT is unusuble with a Raspberry Pi Zero, you must instead connect the pins individually. Attempting to utilize the screen whilst connected via the hat results in an instant system crash. This is not documented in the online wiki, and no paperwork is provided by the supplier. Instead I found this information inside some GitHub issues. If this information was provided it would have saved me a week worth of late night troubleshooting. Incredibly annoying and something that needs addressed.
T**Y
Poor quality
Developed dead lines after a month (see pic). Poor quality in my experience.
J**E
Broke after 1 day of use
This product broke after 1 day of use, it now just static anytime content is sent to it. Clears (black, then white) fine but then shows static no matter what you send. Avoid this brand and product.
J**N
Incredibly low quality e-ink screens!
Having used two of these screens over the past 4 months I can confidently say that these are poor quality screens. They simply do not render images consistently over time. I have experienced two things: 1) Blacks turning into light greys over time (~ 2 days). Blacks in certain parts of the screen simply will not show up as black anymore. 2) Inconsistent pixel activation. Essentially random pixels being activated in large streaks when they are not supposed to be
L**A
Tutto OK
Ottimo bundle, la qualità dei componenti è ottima, ho ricevuto quello che era descritto.
J**N
Excellet rapport qualité/prix
La nouvelle version de l'écran est carrément mieux que la précédente : meilleure résolution et niveaux de gris. Juste faites attention à la connectique au niveau de l'écran, la mienne s'est décollée après deux semaines de manipulation.
J**S
Amazing screens and very easy to set up
Due to amazon's stance on linking to external sites, this review _can't_ post actual useful information (like the technical spec), but I will try my best. These screens are great. At 1-bit color depth (black and white) with a 800x480 display resolution, you can print a fair amount of content on them. The included ribbon and SPI interface board is amazing and makes things basically plug-and-play. Now, this is also in the maker space, so it isn't a generic thing you can plug in to any old computer. You have to have some idea of what they are and how to use them (but, as a hardware newbie myself, I was able to find the necessary information to get it up and running on a Raspberry Pi Pico (RP2040) within a week. From my perspective, the hardest part of using this product is literally wiring it to the micro-controller correctly; after that, it is just sending it commands, and data. The screen is about .8mm thick, and it is made of glass, so you will want to be careful with it. It appears to come with a protective film over the front, and they suggest that if you are using it for development purposes, you reinforce the back as well. I did this by taping it to a wooden clipboard, giving it a rigid surface to be flat against. The fact that this screen runs at 3.3v is great, you won't need a boost converter or any additional hardware to be able to run with most micro-controllers or Raspberry Pi units. I wish that some of their more expensive displays could also operate on 3.3v (instead of 5v, which a lot of them require). This screen supports true partial drawing/ refreshing, which is very nice; though does take a bit of time to get used to as you specify the banks that are going to be drawn and refreshed with the command, instead of the raw pixels you want to modify (in this case, a bank is 8 pixels wide by 1 pixel tall). Full screen refresh appears to take around 5 seconds, so it isn't the fastest out there. It is also worth noting that they strongly suggest that you don't leave the display powered up at all times. The main loop flow diagram they have shows powering on, initializing the settings, drawing the content to the screen, and then power off followed by deep sleeping the display. So long as you don't disconnect the screen from power, you can go through a truncated restart process where you just re-send the settings and can draw right afterwards. This saves a little time, but the entire boot sequence really doesn't take very long (at least in comparison to a redraw). Waveshare has a website with a wiki which contains all the technical specifications for their various displays, and they also have a github with examples on a number of embedded devices for each of their screens. I can't post direct links, but a quick web search should be able to turn those up.
M**E
Clear and pretty, low consumption
Happy with this screen, I was able to build a very pretty dashboard
Trustpilot
2 months ago
5 days ago