Buy anything from 5,000+ international stores. One checkout price. No surprise fees. Join 2M+ shoppers on Desertcart.
Desertcart purchases this item on your behalf and handles shipping, customs, and support to Ireland.
🚀 Upgrade your MacBook Pro’s heart with Sintech — speed, power, and future-proofing in one sleek adapter!
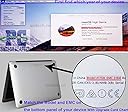
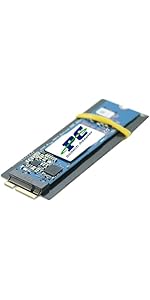
The Sintech NGFF M.2 NVMe SSD Adapter Card is a precision-engineered solution designed to upgrade 2013-2015 MacBook Pro models by enabling the use of high-performance M.2 NVMe SSDs. It supports a wide range of popular SSD brands and models, delivering up to triple the read/write speeds of original drives. With straightforward installation instructions and compatibility tailored for mid-2013 to 2015 MacBooks, this adapter revitalizes aging laptops by boosting speed, reliability, and battery efficiency, making it a cost-effective upgrade for professionals seeking enhanced performance without replacing their device.


| ASIN | B01CWWAENG |
| Best Sellers Rank | 18,830 in Computers & Accessories ( See Top 100 in Computers & Accessories ) 20 in Computer Memory Card Adapters |
| Brand | Sintech |
| Brand Name | Sintech |
| Colour | Black |
| Compatible Devices | Laptop |
| Compatible devices | Laptop |
| Connector Type | M.2 |
| Connector type | M.2 |
| Country of Origin | China |
| Customer Reviews | 4.6 out of 5 stars 2,808 Reviews |
| Finish type | Nvme |
| Item Weight | 0.01 Kilograms |
| Manufacturer | Sintech Electronic |
| Manufacturer Part Number | ST-NGFF2013 |
| Model Number | ST-NGFF2013 |
| Number of Items | 1 |
| Number of Ports | 1 |
| Package Quantity | 1 |
| Power Plug Type | No Plug |
| Product Finish Type | Nvme |
| Product Warranty | 6 Months |
| Smart Home Compatibility | Not Smart Home Compatible |
| Specific Uses For Product | Laptop |
| Specific uses for product | Laptop |
| UPC | 701017254409 701017254492 |
| Unit Count | 1.0 count |
| Warranty Type | Limited |
S**H
Allows for a huge upgrade at small cost
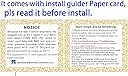
It came with clear instructions and was easy to install in my late 2015 Mb-Pro. I purchased a Samsung 1TB NVME 980 to install, I know it's a bit slower that the 970 Evo Plus but you'll be hitting the bandwidth limit of the MacBook way before you hit the limit of these SSD, it uses less power so the battery will last longer, it has better reliability and it was £10 cheaper. I also chose Samsung because I've had bad experiences with other manufactures of SSDs in the past and the original Mac drive was Samsung. I don't think the adapter actually has any electronics in it? I looks like it's just remapping the pins to the correct locations so drive compatibility will probably be the same across all adapters... but I could be wrong. If you click the SSD into the adapter properly and then into the MacBook with a bit of confidence, everything fits perfectly. I used the supplied Sintech screw to hold them in place, then I put the OEM screw with the OEM SSD and packed them into the box for safe keeping. I went down the route of making a Monterey bootable USB following Apples instructions, it was simple enough to do and worth doing before your new drive arrives. If your OEM SSD has actually died, hopefully you have a time machine backup or you'll have make the USB with another Mac or ask a friend. You will need a pentalobe screwdriver bit, I think it was P5. This will be included in an iFixit kit or similar, I think the SSD screw was a Torx? It looked like a P6 but neither of the pentalobe bits fitted so I used a T4. I hope Monterey will see me through for a few more years before Adobe drops support like they did for Catalina, this laptop still has a good spec with great performance so it would be a real shame if I was forced to move on.
S**A
Works brilliantly, the set up can vary (see instructions in main body of review)
Works brilliantly, though may take a few minutes to get working so it requires a small amount of patience. My write speed has tripled, my read speed had tripled, the laptop is noticeably more faster. If you are having problems installing please see the instructions I have listed below, there are a couple of extra steps required My MacBook Pro is a 13" mid-2014 retina, A1502 model. The NVMe SSD I have installed is a Samsung 970 Evo NVMe M.2 SSD - capacity of the drive is 1TB. Steps to install: 1) Create Time Machine back up of MacBook. For those that don't know Time Machine is free, it is made by Apple and comes pre-installed on your MacBook. 2) Install the drive with the adapter into the MacBook 3) Turn on MacBook, immediately after turning on press and hold 'Command/cmd' and the 'R' Key, this will enter the Apple Restore Partition 4) Enter disk utility to see if the drive is present, if it is present then click ERASE. Name the drive whatever you wish. Set the format as 'Mac OS Extended (Journaled) and the Scheme as GUID Partition Map. 5) Then exit out of Disk Utility (press the red button in the top left of the Window), Plug in your hard drive that you are using as your Time Machine and click the Restore Using Time Machine option. Install it to the Drive you named in Step 4. sit back and let it complete. Additional steps: 4a) for me the Disk Utility would not show the Drive, so what I had to do was shut down the MacBook. 4b) When the device has fully shut down press the Power button again, when you press the power button hold down the following Keys: 'Command/cmd' and 'Option (sometimes this is shared with the alt key as it is with mine)' and 'P' and 'R' 4c) Hold the 4 keys, you will here the MacBook chime, keep it held until it Chimes again and then release 4d) After then wait for the MacBook to boot up into the Recovery Partition and look in Disk Utility, you should see the drive in Disk Utility now. The laptop will reboot a few times before booting into the Recovery environment 4e) continue with steps 4 and 5as they are listed above the additional steps.
M**D
When prepared, works exactly as intended!
This review will be scored based on the product, but will include a note about how it's used. Overall the physical installation process was relatively seamless - upon installation, I believed it was too long and so took a microfile to the screw section in order to fit it, until I put the SSD in and the installation force of THAT pushed the Sintech adaptor even further into the socket than I was willing to go with the bendy-ness of the adaptor. This meant all my filing was pointless.....with a bit of effort and a lot of my Other Half's trust in me around her Macbook, I could've fitted it without mods and it would have worked. I used a Crucial P1, one of the SSDs on the list. Upon installation the SSD wasn't detected, even when using diskutil on Terminal. THIS IS HOW TO INSTALL: 1) USE A USB - Internet Recovery didn't like what I was doing one single bit 2) USE OFFICIAL APPLE - I tried using a .dmg from another website, and there was no luck at all. BEFORE installing, use your old install to update to the latest version, do a Time Machine backup, and then create USB installation media following Apples instructions! I spent hours troubleshooting, so hopefully this solves anyones issues before they have to re-dismantle their laptop. This was on a mid-2015 Macbook Pro 13". The screws you'll need are all 5-point star heads, I in particular used 1.2 and 1.5 and they seemed to do the job. Not official Apple, but worked nonetheless. KEEP THE SCREWS SEPARATE AND ORDERED - it's Apple after all, so they have specific holes to go back into!
N**E
Works perfectly,,,,
I used this adapter in my 2015 MacBook pro 15". Be careful when installing. If it's "bowed" and not flat, it is installed improperly or the screw is overtightened and it will fail. I paired this with a Sabrent Rocket 1TB NVME SSD TLC. I don't recommend the cheaper QLD drive as it's longevity rating is about 1/3 of the TLC version. I get 3200 MB/sec read and write speeds and with a simple kext installation, lower power usage and longer battery life. You will need the latest MacOS to ensure compatibility. I used Big Sur and put it on a bootable USB drive. You will need a bootable USB drive as the new SSD doesn't have a MacOS recovery partition. Install the SSD and boot the Mac from the USB drive. Install MacOS to the new internal SSD. The installer will create the recovery partition, boot partition and data partition on your new SSD... Now, just enjoy the lightning speed and expanded storage. You can also use the Sabrent Rocket 2 and 4TB SSDs as well.
J**B
Slightly the wrong shape
I was upgrading a MacBook Air Early 2014 model with this and a 250GB WD Blue SN550 NVMe; didn't want to pay for a premium Samsung Evo for a 6 year old machine, but didn't want to get the cheapest no name drive available so the WD seemed like a good middle ground. Overall it worked well once it was installed. The machine was running High Sierra and I booted to a Mojave USB stick, the drive was recognised in Disk Utility as an NVMe drive and there were no problems. I haven't encountered the dreaded wake from hibernation problem that seems to affect this generation of MacBook either. I am hoping that was a problem with older OS not knowing what an NVMe drive was, and fixed in later versions. I don't know if it's a placebo effect but the machine felt a bit quicker booting up and logging in, but that might be because it was a fresh install. The only problem I had with this is my adaptor seems to have a manufacturing error. The board needs to line up exactly so the semi circle at the top lines up with the screw hole/standoff on the logic board. Mine didn't line up very well and I have to lightly file this hole to make it slightly bigger so the screw could go through the SSD and mate with the thread. I would guess that the manufacturing tolerances are a bit too liberal for what is quite a tight fit. Overall though, I think this was a one off and even if it's a common problem, it is not a massive headache considering the money saved on not having to buy a 12+16 SSD.
G**E
Works perfectly
I used this adapter in my iMac 27" late 2015". Be careful when installing. If it's "bowed" and not flat, it is installed improperly or the screw is overtightened and it will fail. I paired this with a Sabrent Rocket 1TB NVME SSD TLC. I don't recommend the cheaper QLD drive as it's longevity rating is about 1/3 of the TLC version. I get 3200 MB/sec read and write speeds and with a simple kext installation, lower power usage and longer battery life. You will need the latest MacOS to ensure compatibility. I used Big Sur and put it on a bootable USB drive. You will need a bootable USB drive as the new SSD doesn't have a MacOS recovery partition. Install the SSD and boot the Mac from the USB drive. Install MacOS to the new internal SSD. The installer will create the recovery partition, boot partition and data partition on your new SSD... Now, just enjoy the lightning speed and expanded storage. You can also use the Sabrent Rocket 2 and 4TB SSDs as well.
D**S
Great product - Upgrade Mac Pro 2013 with it!
This is a great product, it looks simple but can save you £100’s depending on what your upgrading. I’ve just upgrade a Mac Pro 2013 (Trash Can) from 256GB to 1TB with this little gadget. Saved myself around £500 as this converts a very special connector to work with normal drives that fit this adapter. Now be warned if you are uograding a 2013 Mac Pro, do your homework first... it’s not just plug and play! You will need to have a bootable version of the Mojave or Catalina (basically which ever version your using), there are guides on line to do this. Without it, the Firmware won’t recognise the new drive / adapter. Hence needing to use the USB bootable version. Once you get your choices screen with the bootable version, your system will now recognised the drive and adapter allowing you to format the drive so it can be used with a Mac, I went for the for Crucial P1 which was a bargin from crucial @ £95.99 delivered. Whilst my previous drive was good delivering 700 R/W speeds, I’m now getting 1,200 R/W speeds, so the machine is even faster. Complete upgrade and my time, £120 a bargain. £20 well spent here. Thank you 🙏
J**J
Adapter works great with 2TB Intel 660p SSD in mid-2014 Retina Macbook Pro. No hibernation problems.
Worked like a charm in my mid-2014 Macbook Pro. Popped in 2TB Intel 660p SSD. Took an opportunity to get rid of some dust accumulated over the last few years (the laptop is less often a jet ready to take of; more of the blessed silence I got used to in the begging of owning my macbook). Reinstalled Mojave to have a fresh start. My Macbook Pro is like a new machine. No problems with hibernation. Lots of space. I was a bit worrying about using a QLC drive but for my usage is mostly OK. 1100-1200 MB/s write speed, 1400-1500 MB/s read speed - much better than my original drive was doing. Yes, it will drop off when I copy a 100 GB file but how often am I going to be doing it? This adapter is great. With it for less than £250 total cost (adapter + new SSD) my macbook pro got new wings and, most likely, a few extra years of use. As others said taking into account that the item is shipped from China the delivery time is not too bad (for me it was under two weeks).
C**N
Compatible con mac
Mi modelo de MacBooks del 2016, con una tarjeta samsung lo lee sin problemas
S**K
Works,.. even on 2017 iMacs, great Vendor support
Ordered two a while ago.. and Amazon didn't ship both. Vendor responded quickly to my complaint and shipped out missing adapter quickly. I couldn't ask for better service. I'm also pretty sure they've added more guidance to the product listing (this Amazon listing) about supported hardware and troubleshooting since my original purchase, so nice to see them continuing to add to their support documentation. I'll waste some of my plentiful shelter-at-home time with installation tips and my detailed experience with these adapters below.. but I'll wrap up the short-version of my review by saying... Bought two already and I'm ordering more to upgrade additional 'retired' iMacs that have come into my office (University IT Support). There's plenty of usefulness in a 2015 17" iMac after it's got a new NVMe drive in it. Long Version... Installation is not trivial, but that's because of how iMacs are designed and assembled. Read a tear-down webpage, take your time and don't force the screen. They're not that hard to crack (I've done it.. and I'm a professional ;-P ). I find, in addition to a plastic cards (old gift card or similar works well).. I like to use an Exacto Knife so carefully slice through the adhesive foam gasket (slowly slice down into gasket in increasingly deep passes, don't jam blade between glass and case). I also like using increasingly thick guitar picks as shims as I work around from top->down sides.. and look for pull-away tabs at outside of bottom gasket section on newer iMacs. Even thought you have to completely gut the iMac's insides to get to the SSD interface on the back of the board, the actual installation of this adapter is easy so I gave it 5-stars. Oh yea, if you don't want to buy a replacement gasket kit.. don't use double-sided tape instead. It's not thick enough to make contact with screen and case. just wrap some tape around outside edge of glass and case. As for how will it works... Pick a supported SSD, avoid the Samsung drives that they warn against using.. and it just works. You can't ask for more. My own results are mixed so far. .but I don't blame Sintech.. and I believe they recently posted a fix for the one issue I'm still having (I'll try today). - 2017 27" iMac: Even though this isn't listed as a supported Model, the adapter works fine in my 2017 iMac. Before upgrade, it was unstable and I noticed some serious errors with the Fusion Drive B-Tree structure, so I pulled both the disk & Apple SSD and upgraded to a FireCuda NVMe drive. Instability persisted but cleared up after I also pulled a pair of 3rd party SO-DIMMs. I suspect both Fusion Drive issues (which Crash Logs pointed to) and a bad pair of SODIMMs both contributed to original problems. iMac runs better than new now (though still short some RAM). - 2015 27" iMac: Again, I replaced a fusion set that was causing problems in this iMac. This iMac also seemed to be having problems with it's Fusion Drive setup prior to upgrading. Installation and clean-install on new drive went flawlessly and iMac worked great.. except it then started crashing when going to sleep. I've since seen new info here on a possible fix so I'll give that a try.. though it'll take me a while to confirm the issue is gone since it was an intermittent problem. No indication that there's a problem with the adapter/drive while the computer is in use though. One thing to note if you plan to replace a Fusion drive set with this... If you use CarbonCopy Cloner (or presumably Disk Utility too) to clone your Fusion drive Volume to a disk image or to your new NVMe drive, it clones the 2-drive Fusion formatting too. You'll end up with two partitions on your single NVMe.. with one staging new & frequently-used data.. and older data getting migrated to the 2nd partition. It'll look like one Drive from the Finder, but I have suspicions that Apple's data staging code is introducing corruption into Fusion Drive's directory B-Tree so best to not introduce this un-needed complexity. Better options... 1. If you've got.an up-to-date TimeMachine backup.. do a clean Mac OS install onto new drive and a data migration from your TimeMachine backup.. or... 2. Get an external USB NVMe adapter or NVMe USB case.. Do an internet recovery (boot w/ Command-R pressed) and install a clean version of MacOS onto the new NVMe drive (usb-connected).. Boot off the NVMe drive and update to latest OS if you need to (I've seen Internet recovery install latest Mac OS release on some Macs, and older versions on others).. Now, do a Data Migration from the Fusion Drive set to the new NVMe. When it's all setup.. then pull the iMac apart and swap the drives. Good luck.. Steve.
P**H
It works with MacBook Air (Early 2015)
Worked as expected. Used Crucial P3 Plus 1TB PCIe 4.0 3D NAND NVMe M.2 SSD , which is not listed in compatible SSDs List but worked flawlessly. Read and write speed increased from earlier (doubled) but not reached maximum that the SSD offers (which is obvious).
T**E
Works well but does not work with Crucial P1
Bought this and a Crucial P1 500gb hdd as Amazon indicated they were often bought together, and Crucial P1 was listed on one of the photos. However after spending half a day trying to various ideas to get it to work with the adapter I gave up. Next day bought a Samsung EVO 970 500gb hdd from a local store, as this was one used in a YouTube video demonstrating the setup of the adapter, and it worked immediately.
J**S
Funktioniert und passt !
Aufrüsten meines MacBook Air 2017 hat super funktioniert. Das der Adapter zu dick aufträgt und die Unterseite sich nicht mehr verschließen lässt kann ich nicht bestätigen. Bei mir hat alles gepasst. Ebenso die Passgenauigkeit der Schraubenbohrung. Vielleicht wurde hier aufgrund der schlechteren Rezessionen nachgebessert. Verwendet wurde ein aktueller Crucial P3 1TB MacBook Air 2017 (MacOS Monterey) Boot Stick mit MacOS Mojave, erstellt mit Windows. Festplatte musste nach dem Bootvorgang über das Festplattendienstprogramm lediglich formatiert werden und war dann auch verwendbar für die Installation. Alles machbar für jemanden der sich mit so etwas eigentlich nicht auskennt.
Trustpilot
1 month ago
3 days ago