Buy anything from 5,000+ international stores. One checkout price. No surprise fees. Join 2M+ shoppers on Desertcart.
Desertcart purchases this item on your behalf and handles shipping, customs, and support to Ireland.
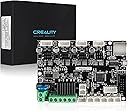
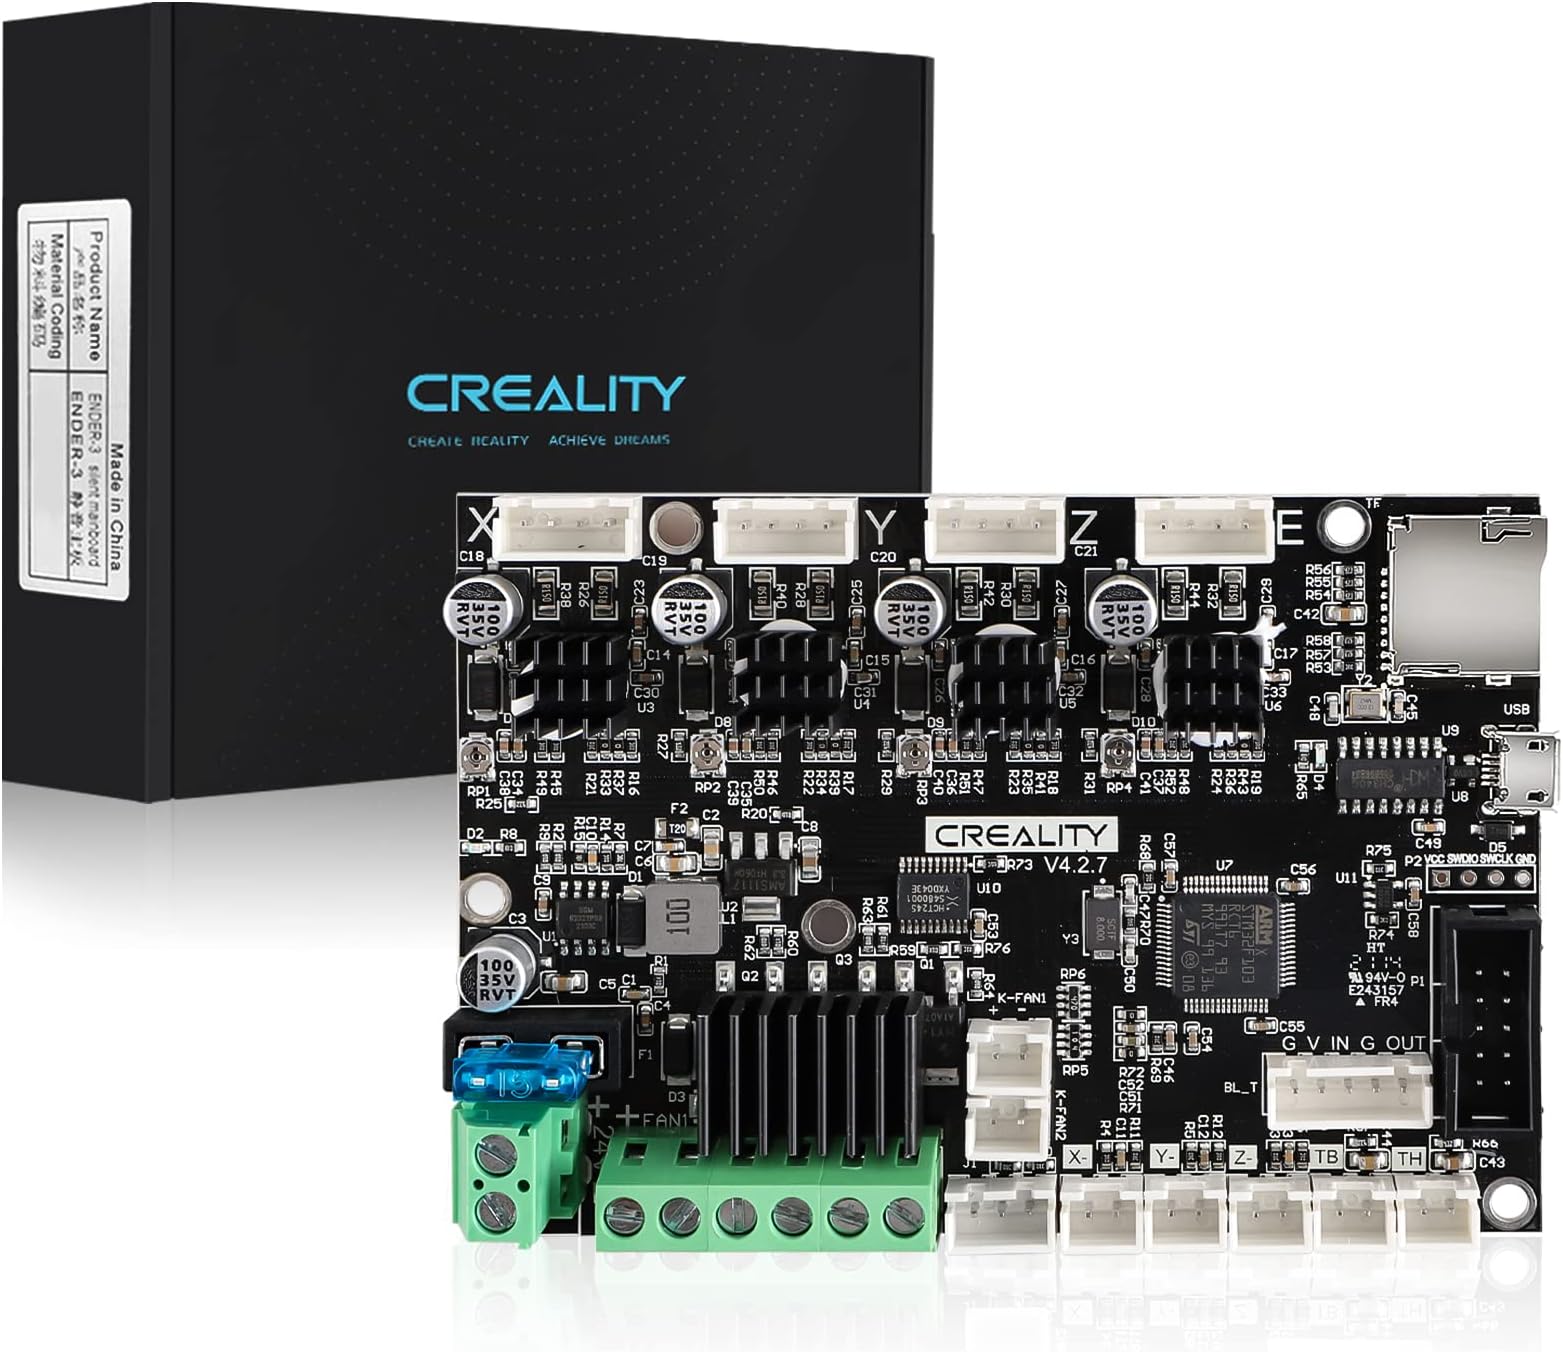
🔧 Upgrade your Ender 3 to silent precision — because your prints deserve the best!
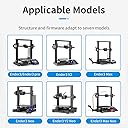
The Official Creality Ender 3 Upgraded Silent Board V4.2.7 features ultra-quiet TMC2225 stepper drivers and preinstalled Marlin 2.0.1 firmware, delivering a significant noise reduction (<50dB) and enhanced motor control. Compatible with multiple Ender 3 models, it offers plug-and-play installation for Ender 3 and easy firmware flashing for others, backed by responsive technical support.


| ASIN | B09NMJMPN1 |
| Best Sellers Rank | #24,604 in Industrial & Scientific ( See Top 100 in Industrial & Scientific ) #314 in 3D Printer Accessories |
| Brand | Creality |
| Compatible Devices | Laptop, Smartphone |
| Customer Reviews | 4.3 out of 5 stars 1,006 Reviews |
| Graphics Card Interface | Integrated |
| Item Weight | 4.2 Ounces |
| Manufacturer | Creality 3D |
| Mfr Part Number | Creality Ender 3 Mainboard |
| Model Number | Creality Ender 3 Mainboard |
| Smart Home Compatibility | Not Smart Home Compatible |
| Unit Count | 1.0 Count |
B**X
Official Creality Ender 3 Silent Mainboard V4.2.7
The Official Creality V4.2.7 Silent Board with integrated TMC2225 stepper drivers is a popular upgrade for the Creality Ender-3 series of 3D printers. It replaces the older 8-bit or earlier silent boards with a 32-bit ARM based mainboard and modern motion control firmware (Marlin 2.0.1) bringing several meaningful improvements over stock boards. Performance and Noise Reduction One of the most noticeable benefits of installing the V4.2.7 board is the noise reduction during printing. The integrated TMC2225 drivers provide much quieter stepper motor operation compared to many older driver chips, which helps turn a noisy Ender 3 into a significantly quieter machine.. ideal if your printer is in a shared space, studio or workspace. Improved Features and Compatibility Upgrading to this board introduces the 32-bit processor, which enhances motion responsiveness and supports updated firmware like Marlin 2.0.1 right out of the box. The board offers built in support for features such as BLTouch auto bed leveling and filament runout sensors and includes thermal runaway protection for added safety. The board is designed to be a direct replacement for multiple Creality printers.. including Ender 3, Ender 3 Pro, Ender 3 V2 and others — though for some models you may need to flash the matching firmware via SD card after installation. Ease of Upgrade Installation is generally straightforward if you’re comfortable with basic printer disassembly and firmware flashing: physical removal of the old board and installation of the V4.2.7 board can usually be done in a few minutes and then you update the firmware using a formatted SD card. Real-World Notes and Limitations Many users praise the reduction in noise and smooth motion after the upgrade, but there are feedback reports online about firmware compatibility issues.. especially if the wrong firmware is flashed for a particular Ender model.. and some users have struggled with stepper motors not moving correctly until the correct firmware is installed. Additionally, some community members note that the board’s behavior can vary depending on the firmware used, which means careful selection of the correct Marlin build is important.. Summary Overall, the Creality V4.2.7 Silent Board is a worthwhile upgrade if you want a quieter and more modern control board for your Ender 3 printer. It brings 32-bit performance, significant noise reduction and support for popular upgrades like BLTouch.. but be prepared to flash the correct firmware for your specific printer model and double check your connections during installation.
S**W
Super silent, very glad I upgraded, but Creality firmware lags by a few years for Ender 3 Pro
I got this board installed easily enough on my (1st generation) Ender 3 Pro by following some online video tutorials. The biggest challenge was the old board had all of the connectors hot-glued, so I had to peel off a lot of glue to release the connectors from the old board. However, once that was done, this was fairly straightforward to install. I was also installing a BL touch at the same time, and I wasn't sure if the firmware on the board would support it out of the box, so I downloaded the appropriate code from the Creality website. The most current code I could find on their website for this V4.2.7 board (that supported BL touch) was Marlin V2.0.6 (under the basic Ender 3 section, not the Ender 3 Pro section). The only odd thing I've noticed is that when it's auto-leveling with the BL Touch, this board intermittently turns off the hot end, so it cools while leveling, and then you get a thermal error about 10 seconds into the print because the nozzle is too cold. I have searched online for an answer to this, and haven't found the "right" answer (to keep the hot end turned on during leveling), but did find a work around by adding an M109 command to my startup Gcode, to force the hot end to heat up again. I wish Creality kept their code more current, so hopefully this helps you if you encounter this problem with this board. Overall, I love this board. It's super silent, and the only noise is the fan. Rarely you can hear a bit of stepper noise (just barely) for a moment when it's printing an interesting curve, but that's it. Even with Creality's outdated firmware, I'm giving this 5 stars.
S**I
Great upgrade for Ender 3
The motherboard on my stock Ender 3 died due to loose power connection. Couldn't get this to work out of the box and contacting Creality tech support is a new level beyond frustrating. But once it was set up and running it turned out be great. The steppers are very quiet now and it's been working great.
C**W
This is not the simplest of upgrades, but BOY is it WORTH it. So quiet!
The bottom line. This board DEFINITELY quiets down your Ender printer, if you have one of the original 8-bit, non-silent mainboards. Details of my experience follow. First off, you need to do the research on your printer. Follow instructions to take off the cover and get a look at the mainboard. Mine was V1.1.4 which means it's an older 8-bit board, using the cheap, non-silent stepper motor drivers. If you want to replace the mainboard, you're going to need to take this cover off, so you might as well do it and get a look under the hood. (I uploaded a picture of my old board.) The models listed show what printers this board works on, but newer versions of some of these printers already come with a newer, 32-bit board, so you'll want to make sure you need to spend the $$ first. Secondly, the physical installation of the board is pretty easy. Your printer should have come with all the little hex keys you need, and you really want to make SURE that you know where everything plugs in. On my ender 3 pro, the cables for the X, Y, and Z stop switch, as well as the cables for the X, Y, Z, and E motor ports are all labeled, and can only go one place. It's the thermistors (temp sensors) for the heated bed and the extruder nozzle that look exactly the same. Do yourself a favor and label them left and right or something. If you don't you might get them reversed, which will mean you'll need to open up your printer and switch them again later. I reversed them. Didn't blow anything up, but when the bed is heating, and the nozzle is registering the temp increase, I knew I'd screwed up. Nextly, this board came with an OLD firmware. SO ANNOYING, because everyone said it SHOULD come with a new one. It didn't. When I downloaded the firmware for the 4.2.7 board from Creality's website, ***it turned all my menus to CHINESE!*** So get this...I literally had to download the source code and build the latest bugfix release of Marlin's firmware myself using Visual Studio Code, and Marlin's Auto Build Marlin plugin with the help of some YouTube videos. In addition, Octoprint didn't like that the HOST_ACTION_COMMANDS option wasn't enabled, so then I had to make that change in the source code and recompile. Then I flashed the firmware to my printer, which is thankfully easy to do with the new board's bootloader. Just drop the .BIN file on the SD card, and boot up the printer. (A note, if you get an EEPROM initialization warning: Take the SD card out when you get the EEPROM warning, power cycle the printer, select RESET, and you'll be in business after a single annoying beep. You won't get it again.) If this all sounds like a hassle, it really is. I was a programmer for a couple years, and work in IT, so this wasn't the end of the world for me. I could figure it out. However, if you're a hobbyist with no coding experience, and don't want to bother with all of this, then you might want to consider paying a 3d printer nerd near you to help you figure this out. Because while I knocked off a star for this hassle.... ...IT REALLY WAS WORTH IT! My printer is in my bedroom. My wife has absolutely nixed overnight prints because with the stock board, the printer was just so. darn. LOUD. I can't blame her. But after this board install, my printer's loudest feature is the fans, which is really just white noise. The motors are SO DARN QUIET. I can barely hear them sitting a foot away. It sounds hard to believe, I know. I uploaded a video and I hope you can hear the difference, but regardless trust me, the difference is night and day. When looking at this upgrade, I wondered if I was flushing my money down the toilet, but aside from the hassle that the upgrade and firmware compiling was, I am SO happy I did this. Your mileage may vary when it comes to the firmware. Maybe by the time you get to reading this review, Creality will make it more obvious which printer firmware you need, but for the Ender 3 Pro, most of the firmwares were for options with auto-leveling sensors, or filament runout sensors, or whatever. When I flashed the only one that looked promising with the 4.2.7 board revision on it, it turned everything to Chinese. I spent hours on this, and I can imagine someone with no coding experience might spend even longer. You just need to be aware of the possibility of having to do some work. But it really is worth it. So quiet now!
D**C
Easy to install and super quiet
Installation was easy. I took a photo of the original board (v1.1.4) connections and labeled some of the wires. I connected the wires to the new board following the labels on board and in the small instruction card. I powered it right up and was printing using octoprint once more. Only now the beeps and squeaks are gone. The only sound comes from the fans. I should have done this a long time ago! A couple of things to note. 1) The USB port is a micro USB compared to my old boards mini USB. I needed to swap the cable I was using for Octopi. 2) The included firmware worked just fine with my original Ender 3. I downloaded an updated firmware directly from Creality to an SD card so I could add Bl touch leveling. The added safety features and silence of this board make it an easy recommendation. The build quality seems fine. I really appreciate that all of the ports are labeled clearly. The board fit perfectly.
H**0
Super replacement part.
Great BUY! Comes without your type of Firmware you are used to . But is capable of Auto Tramming , Bed Leveling, Z touch off using a feeler gage, Host download auto run, Flow, temperature and auto homing all are capable with this board . AND IT QUIETS DOWN THE MACHINE WHILE PRINTING!
J**C
Trash Company, Trash Product
I am pretty much done with Creality as a company after this product. I finally dug into 3D printing to work out all the bugs. I have taken this Ender 3 apart twicee, figured out every problem, how it works, figured out how to throw G code at it, understanding every nuance... This board is crap. Firstly, I had it equipped with a sprite but for whatever reason I needed a CL or BL touch plugged into the thing for it to so much as home. It was expecting data from a non-existent piece of equipment. Fine, I fork over the 32 dollars for the CL touch (80 for the sprite, 40 for the new board) and low and behold it finally homes, but it was homing 4 inches above the board. So I dug into the manual more which wasn't helpful AT ALL for the CL touch and I find out the following as I try to print literally anything on this board/firmware: -I gotta constantly disable step motors before I do any adjustments to get the z axis below the "zero" AGAIN, IT IS 4 INCHES ABOVE THE BOARD! Never figured out how to do that in the menus so I had to connect a PC to it to even level it properly. -The stupid board resets all my settings when I turn it off, this is apparently a common problem with the firmware, goes back to Chinese. -Fine, I'll have all the G codes ready in case of a reset, I'll type all of them in really quick, save the settings, and I should be at the zero point I was before with a perfect, crisp, paper scratch for leveling.... EXCEPT IT SOMEHOW DELETED MY SETTINGS BUT WENT EVEN LOWER TOWARD THE BOARD AFTER ZEROING IT, I COULDN'T EVEN RAISE IT BACK UP EVEN WITH THE RIGHT GCODES. The marlin versions I found (and what I built) all had their own problems, seems there are variants of this 4.2.7 board that work better than others or don't work at all. I am buying a bambu lab for my next 3D printer, they understand that these things should be tools and not time vampires. I will never recommend Creality to anyone. Out of the box it was mostly fine but upgrading it has been hell.
M**I
No motor noise - the dream is a reality
Bought this as a drop-in upgrade for my Ender 3 Pro, replacing the 4.2.2 mainboard with 8-bit motor drivers. The noise difference is astonishing - the classic whining motor noise is completely gone. You can barely hear a faint hum on big, fast moves, which could even be due to physical movement of the belts. The fans are now the loudest part of the printer, but they're just white noise and it's easy to tune them out if I'm on a voice call or working near my printer. Physical installation was simple and fun - the board was clearly labeled and had the same layout as the 4.2.2 board. The slowest part of the process was removing the hot glue from the old board's connectors and terminal blocks. The board had an ancient flavor of Marlin 0.0.8 firmware. I flashed it to an official firmware from the Creality support page, which worked fine but had some different config features from the original board. I researched how to customize and compile my own Marlin firmware, which took an hour or two, but now it's back and more capable than ever and I can add auto-leveling hardware later. I had to recalibrate my E-steps after installation (never a bad idea). I printed an XYZ test cube and the XYZ steps were already spot-on.
S**A
100% worth the silence
I honestly would consider this upgrade necessary to be able to even exist in the same room as an ender 3 during printing, it should honestly come with this kind of board by default. The motors become practically silent, they're inaudible over the fans on the print nozzle, which become the new maximum amount of noise the printer makes. Installation is relatively easy, the biggest nuisance is the glue creality adds for shipping and hard to remove wires. I advise taking pictures and keeping track of the wire orders, there's one pair of wires which arent visually distinct so keep good track of them. The firmware update was also a bit annoying to figure out so i'll explain for you: check what type of firmware you need from their reference sheet (the base ender 3 is 32bit) and search for the V4.2.7 firmware and suggested bit depth that creality themselves have. On the firmware page of their site click older versions if you don't have an ender 5 and download the ones for your model. Extract the folder, and go through the folders with names matching the board and firmware they suggest (either 2.0.6 which is in the main folder, or 2.0.1 V0.06), for ender 3 the file is called "Ender-3 Marlin2.0.1 - V1.1.2 - ALT - TMC2225.bin" which you'll copy to the microSD on it's own. Put the SD card into the printer, power it on, wait, and when it reboots the screen to take you to the main menu it's done. you can power off and remove the SD or change media from the software, dont forget to delete the .bin file after or it'll flash the firmware again. Barring the slightly tedious firmware nonsense this was an extremely simple and potent upgrade, the motors are truly silent now, and it honestly blows my mind how much signal processing makes a difference. plus the board comes with all the voltages set to the maximum the motors want for good speed, it makes the printer movement a lot snappier.
L**O
Bien
Excelente, funciona perfectamente y no hace ruido, aunque me lleve un pequeño susto cuando la instalé, el pequeño ventilador no giraba cuando hice la prueba, era porque tenías que ponerle manualmente las revoluciones si lo querías probar, todo lo demás bien.
B**3
Works great and super quiet
I just got finished installing it and have only run a couple very short prints but I’ve been doing a bunch of upgrades to my Ender 3 and this is for sure one of if not the best one I’ve done so far. It makes the motors whisper quiet and I needed a new board anyway because when I was doing some other work I accidentally fried something in the other one so that the centrifugal fans would never kick in. Oops right. Also I don’t know if it’s just upgraded firmware or something you can only get on a different board but it has a different version of the firmware on it and it has a different layout with more features which is super nice. And also I’m hoping this one won’t have some of the glitches the original board had as I haven’t had any come up yet where it would on the original. One thing to keep in mind is they don’t send very good instructions for swapping over but if you’re at this point of messing with your printer I’m sure you have a good enough understanding of it to do everything. And if you’re nervous just take pictures and mark where things go. It is just a plug and play swap. Overall great upgrade and highly recommend.
M**X
Me funcionó sin problema.
Batallé, pero la configuré y quedó bien, muy silenciosa. 1 año de uso y trabaja bien.
G**R
32 bit upgrade mother board v4.2.7
Seems to be a good authorized mother board, after I got it working. My old one had the terminals for the bed heater wires melt. Seems to be a common issue. Link for install Instructions in box is a dead link. Take a few cell pics before swapping out old board. Needed to consult a few different YouTubes to figure out the firmware flashing instructions. Comes loaded with software, but you do need to do flash it with a .bin file for your screen pad to work with it. Finding the right one can be a little tricky. If one doesn't work, you have rename the new one for each attempt. Example: firmware_numbr1.bin Only change the *number1*part to anything you want, but keep the rest. Sounds simple, but it wasn't easy to find that tid bit. A couple of searches on Creality eventually gets what you need. If you have an older Ender with a 2 plug (2pin +3 pin), BL Touch, then you have to remove the 2 pins from the 2 pin red plug that used to plug in the old Z stop position and plug them in with the normal 3 pin plug goes. There is 2 empty spots before, and that's where they go. The old Z stop spot is no longer used. Took a couple different Youtubes before I found someone mentioning that and got it to finally work. Hope this helped. Giving it a 4 stars out of 5. If it came with solid instructions I would have given a 5 star rating.
Trustpilot
3 weeks ago
1 week ago