🎉 Level Up Your Game with Retro Vibes!
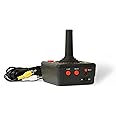
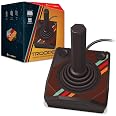
The Basic FunThe Bridge Direct Atari Plug & Play Joystick is a lightweight, battery-powered gaming controller designed for effortless plug-and-play use. Weighing just 354g and featuring an HDMI interface, this joystick allows you to dive into classic gaming without any assembly required. Perfect for nostalgic gamers looking to relive their favorite moments!
| Controller type | Joystick |
| Item weight | 354 g |
| Power source | Battery Powered |
| Hardware interface | HDMI |
| Number of batteries | 2 AA batteries required. |
| Material | Plastic |
| Global Trade Identification Number | 00885561095609 |
| UPC | 885561095609 |
| Product Dimensions | 9.53 x 10.16 x 12.7 cm; 353.8 g |
| Batteries | 2 AA batteries required. |
| Item model number | 09560 |
| Assembly Required | No |
| Batteries Required? | Yes |
| Batteries Included? | No |
| Material Type(s) | Plastic |
| Color | Black |
| ASIN | B0725C6B4X |
C**Y
It's OK but cheap & bad graphics
This is just a cheap plug in game, graphics are old (and I mean old) but since all I wanted was a cheap game then I'm ok with this one.
R**O
Muy entretenido
Es bueno recordar viejos tiempos, muy divertido...
J**.
Lots of Fun
Bought this for my son's birthday, he likes the old classic games and enjoyed playing a console like this at a babysitters.Very fun, and very easy to hook up
A**S
TRASH DONT BUY
The game’s selection is terrible not to mention it doesn’t even save your high score!!!!
B**N
Well done but needs adjustments to the joystick mechanism-- instructions here.
Perfectly fine for the current price of ten bucks. Got it for Breakout, Centipede/Millipede, and Missile Command primarily. Only four stars because the joystick is a wrist killer. There is an easy fix, however. The joystick takes a lot of effort to move because there is too great a gap between the four pads at the base of the joystick and the four directional switches that activate movement. I'll try to post a picture or two, but a five-minute fix is to remove the batteries from the unit and unscrew the four screws on the bottom of the unit. This will free the joystick mechanism from the electronics. The joystick consists off a rubber sheath over a plastic insert. The top of the insert is hollow. Simply take a small nail or screw with a thin head, or in my case a single stud round LEGO piece, and drop it down the top of the plastic insert so the head of the nail/screw/LEGO stud remains on top, not falling through. That extra thickness of the nailhead/screwhead/LEGO stud serves to shorten the travel distance required to generate movement once you reattach the joystick to the electronics. When reassembling, take care to align the larger pair of pads on the bottom of the white inner stick with the cutouts visible on the bottom of the black outer sleeve. Also, make sure you put the Fire button back in it's hole! You should be able to test your results without screwing the two portions of the product together... just swap a different nail/screw/LEGO piece if the results aren't satisfactory.
Trustpilot
3 weeks ago
4 days ago